
1. Getting started
Clock Loom runs in your browser — there's nothing to install. You need an account so your board is saved and follows you to every device.
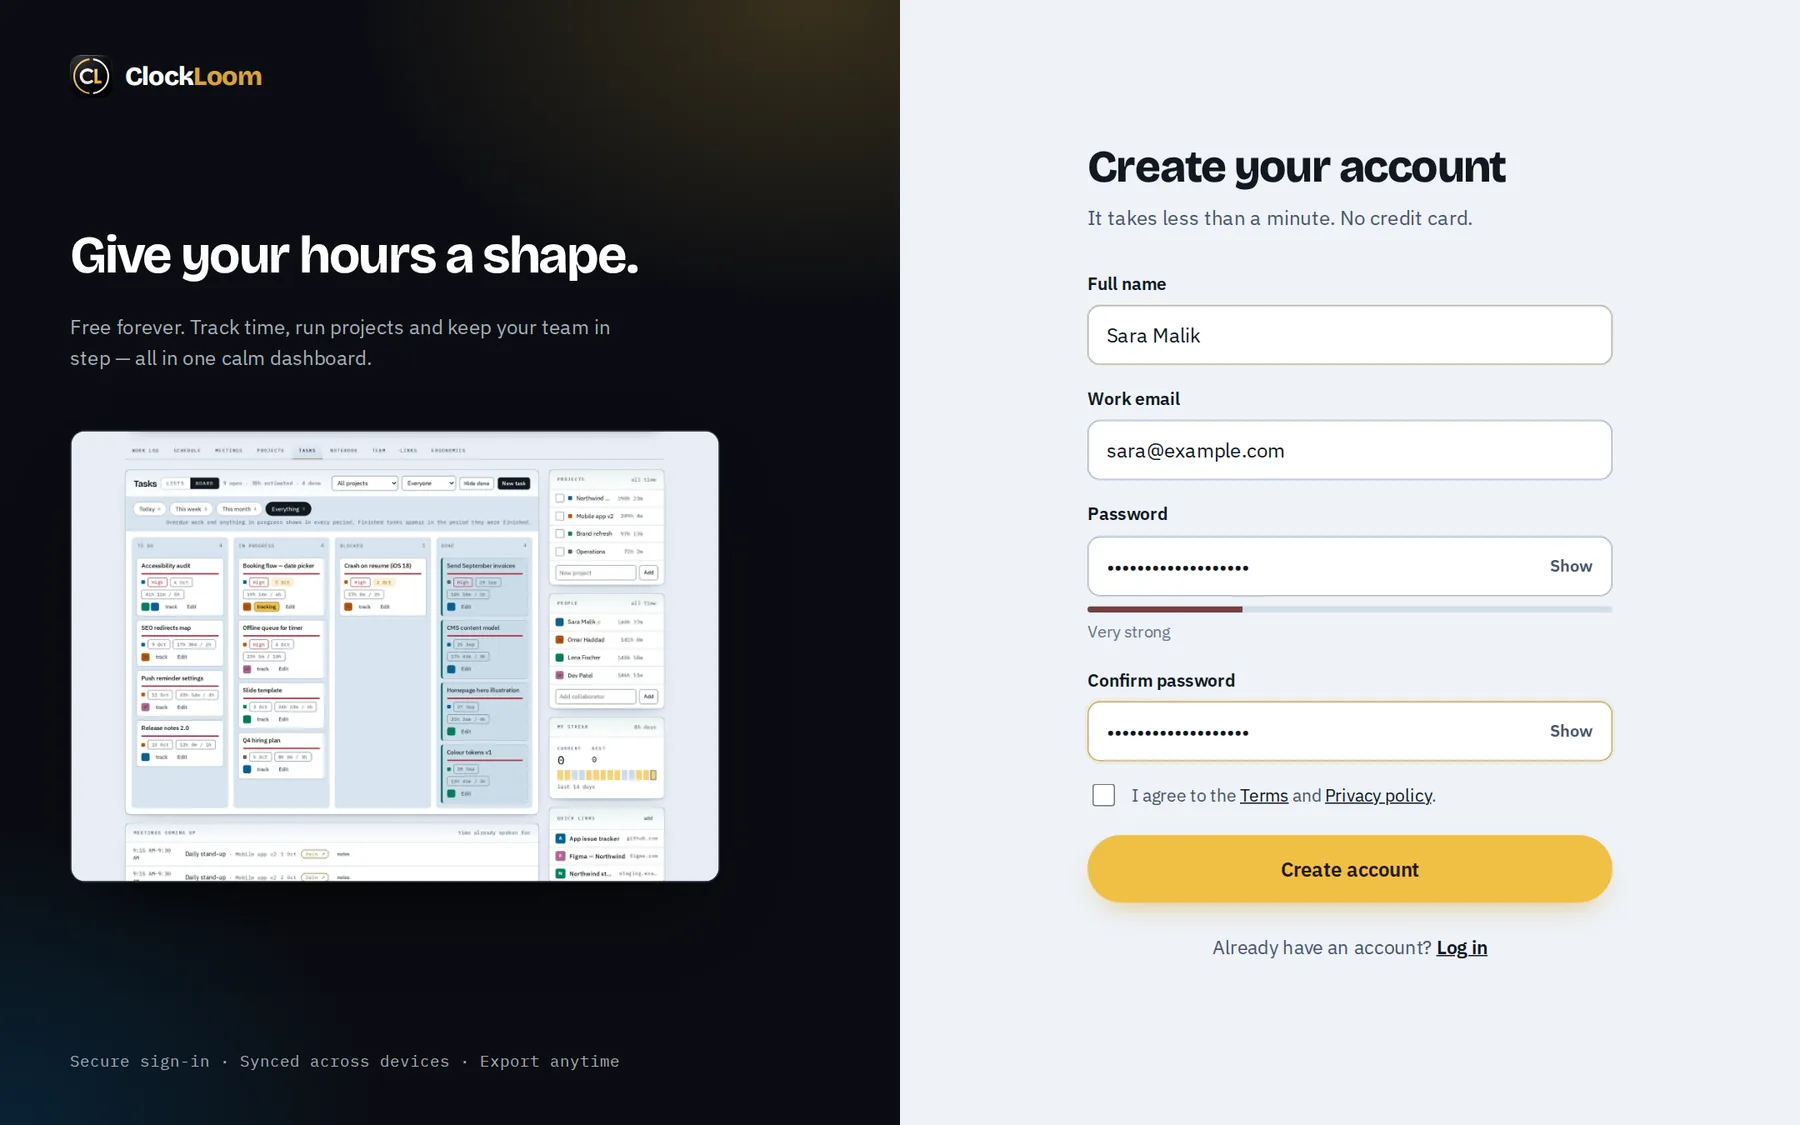
- Create your account. Go to Sign up, enter your name, email and a password (8+ characters with letters and a number), accept the terms and press Create account. You land straight in your dashboard.
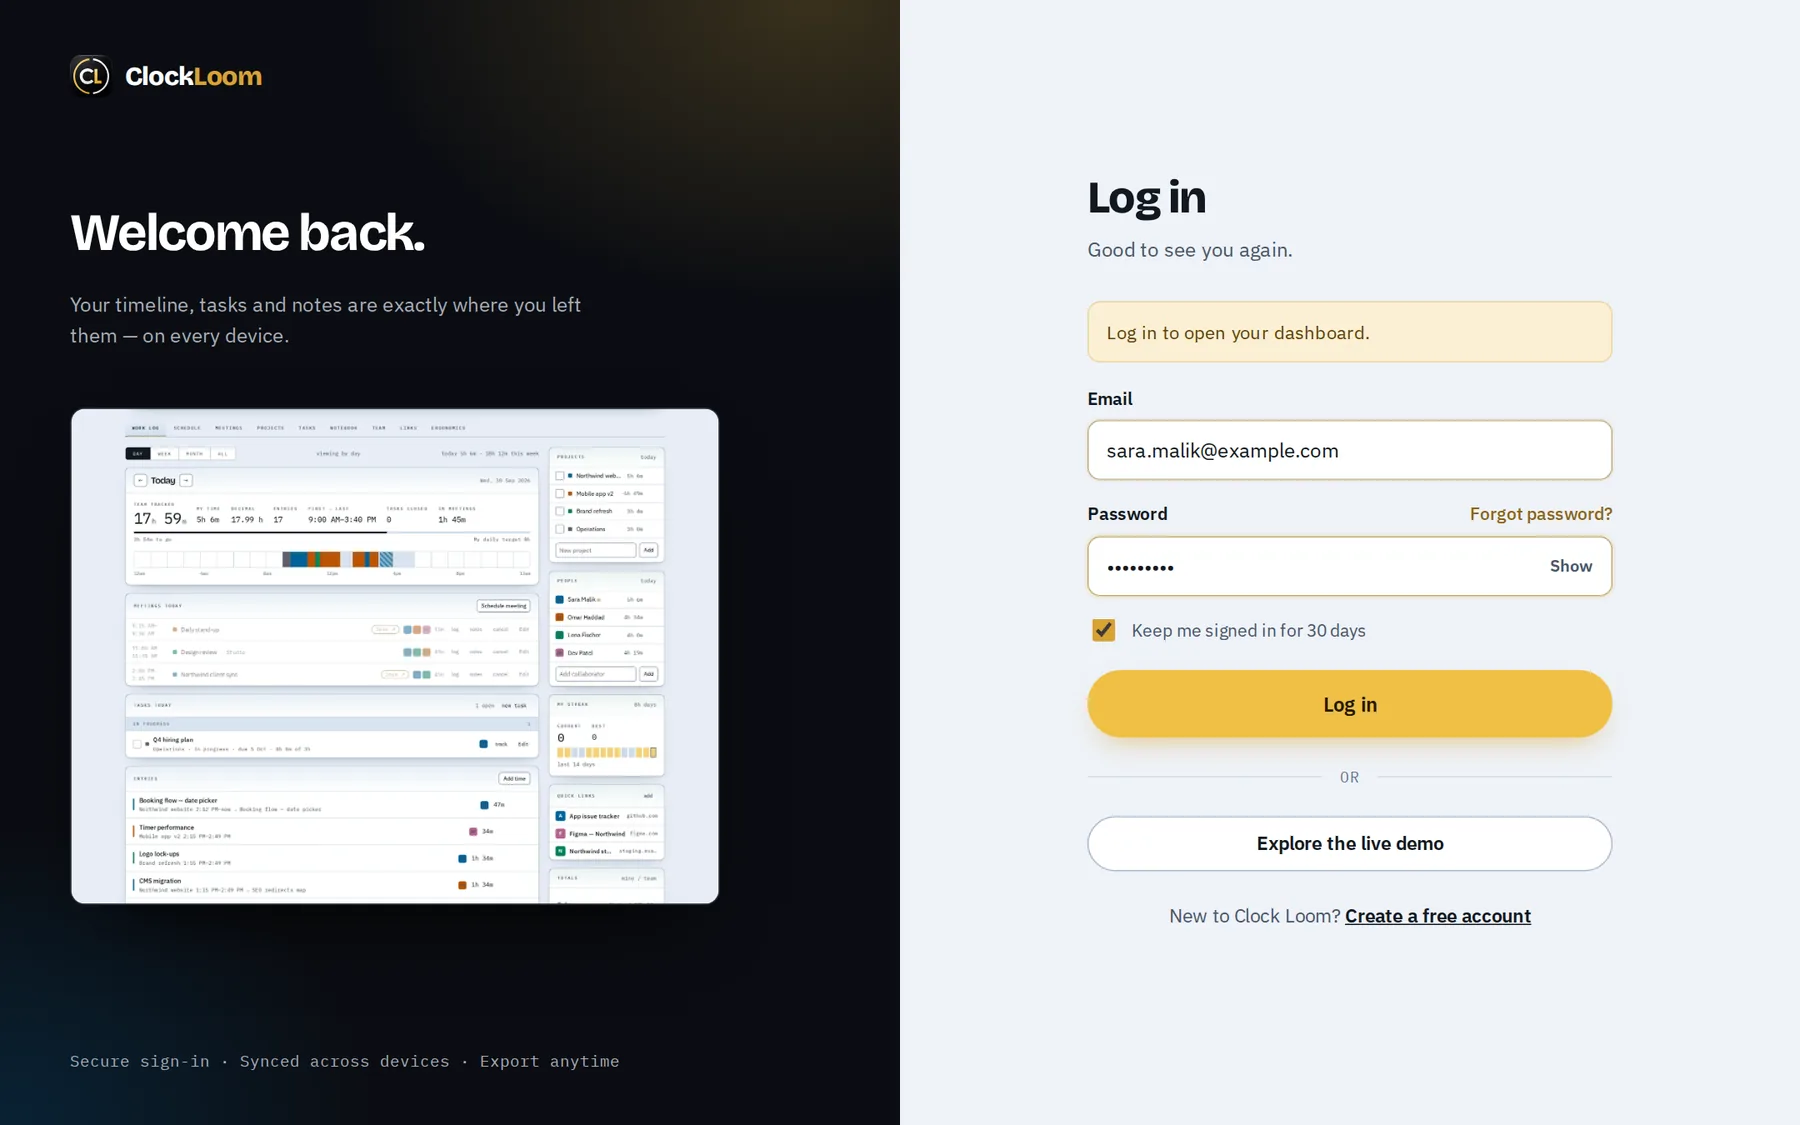
- Log in next time. Use Log in. Leave Keep me signed in ticked on your own computer; untick it on a shared one.
- Forgot your password? Use Reset password; the emailed link works for one hour.
2. The dashboard at a glance
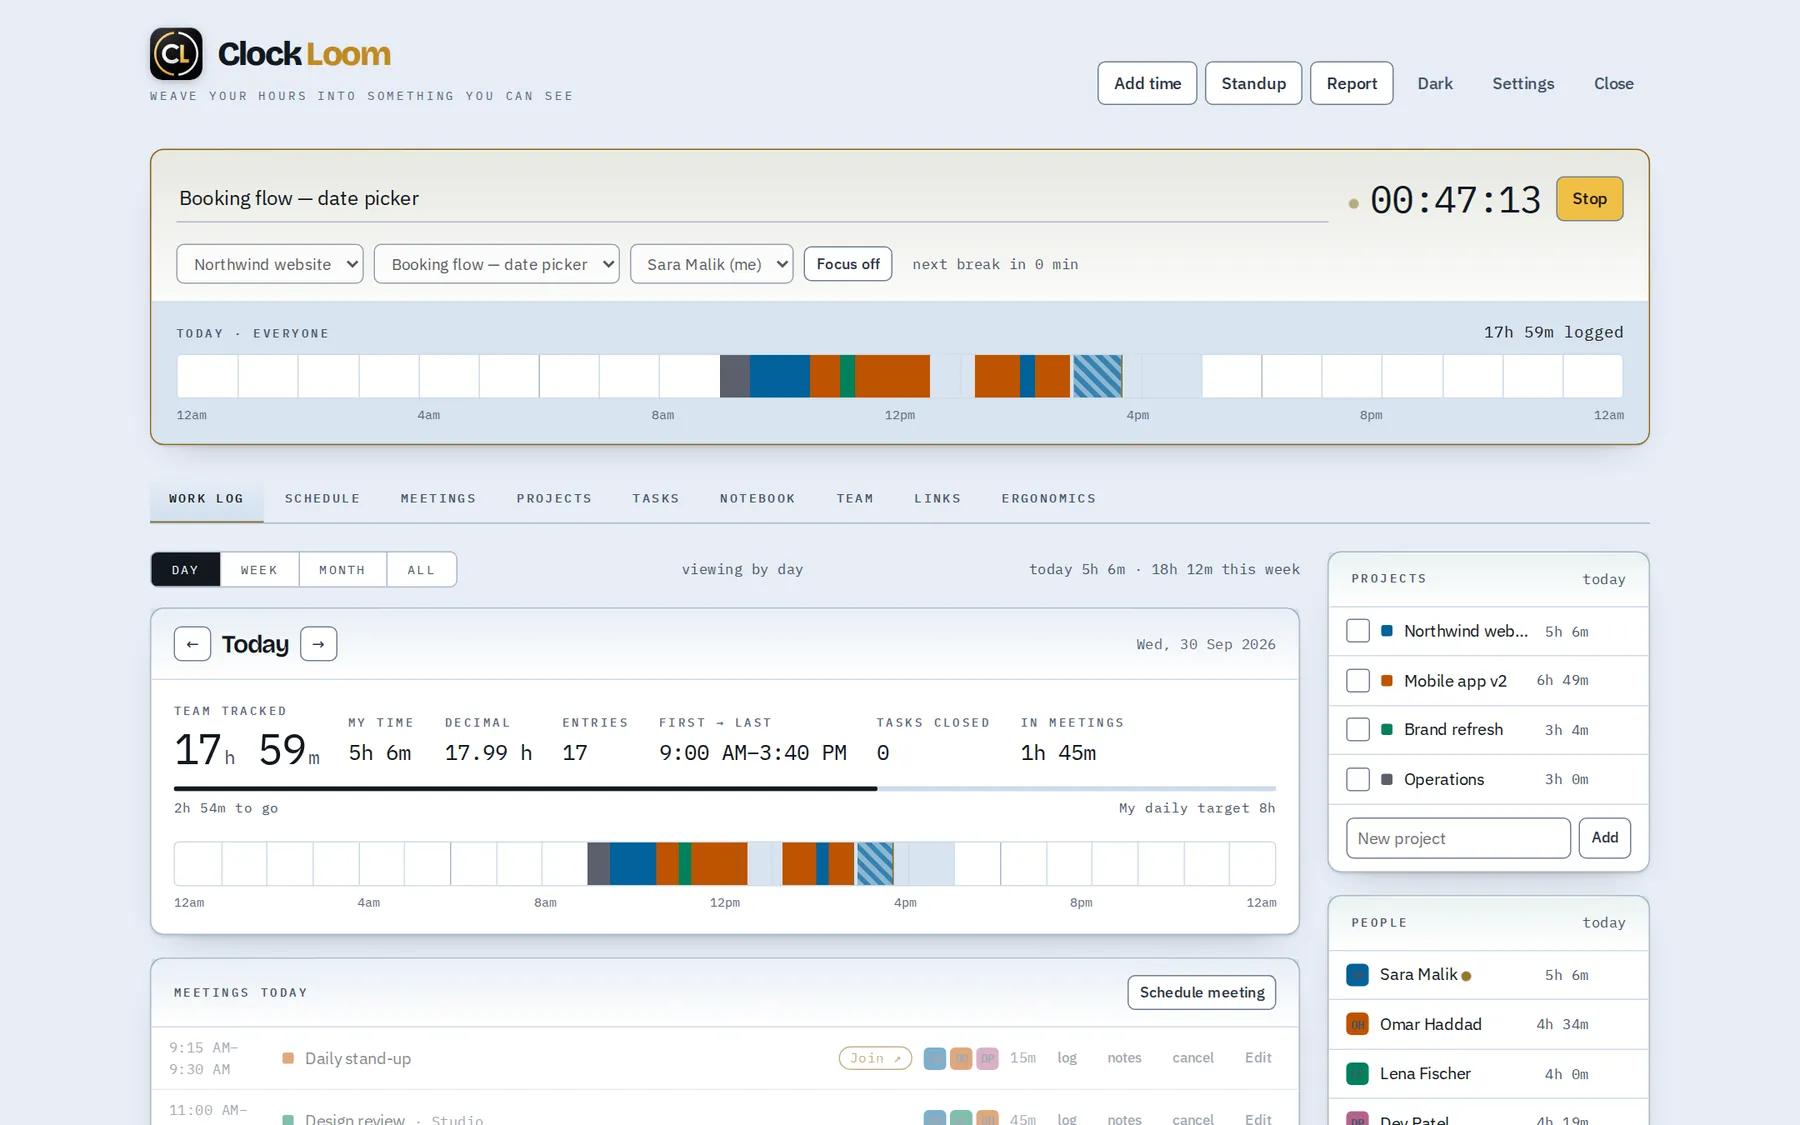
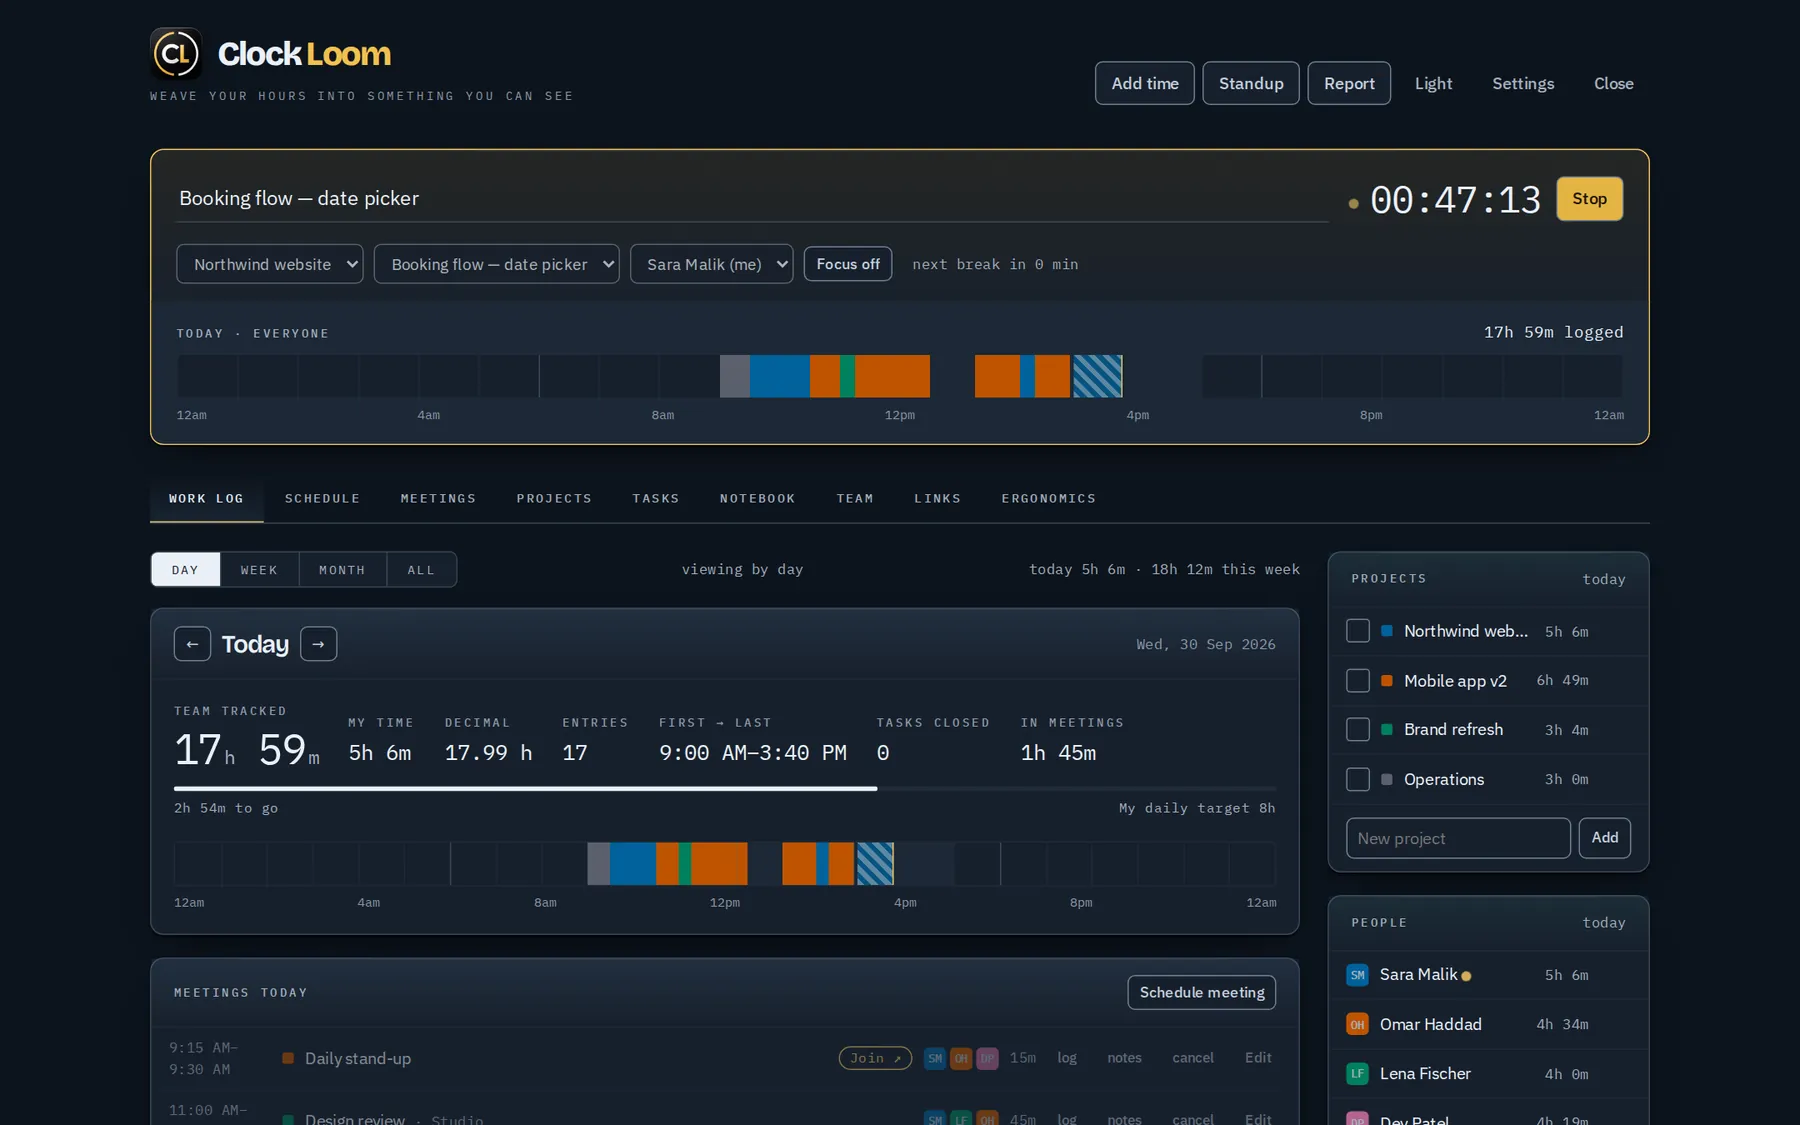
Everything lives on one page. The top half is always there — the timer and today's timeline — and the tabs below switch between views.
 12345678
- 1Clock Loom — your board's name and tagline.
- 2What are you working on? Type a short note for the time you're about to track.
- 3Project, task, person — who the time belongs to, and what it's for. Focus starts a Pomodoro-style session.
- 4Timer & Start/Stop — one click to start, one to stop and save.
- 5Today's loom — every entry and meeting on a 24-hour strip for the whole team.
- 6Tabs — Work log, Schedule, Meetings, Projects, Tasks, Notebook, Team, Links and Ergonomics.
- 7Add time, Standup, Report — log time by hand and generate notes and reports.
- 8Theme, Settings, Close and, when signed in, your account button (see section 17).
3. Tracking time
With the timer
- Type what you're doing in What are you working on?
- Pick the project, optionally a task, and the person (you, by default).
- Press Start (or S). The clock runs and a striped block grows on today's loom.
- Press Stop when you're done. The entry is saved to the Work log. Anything under 15 seconds is ignored.
Adding time by hand
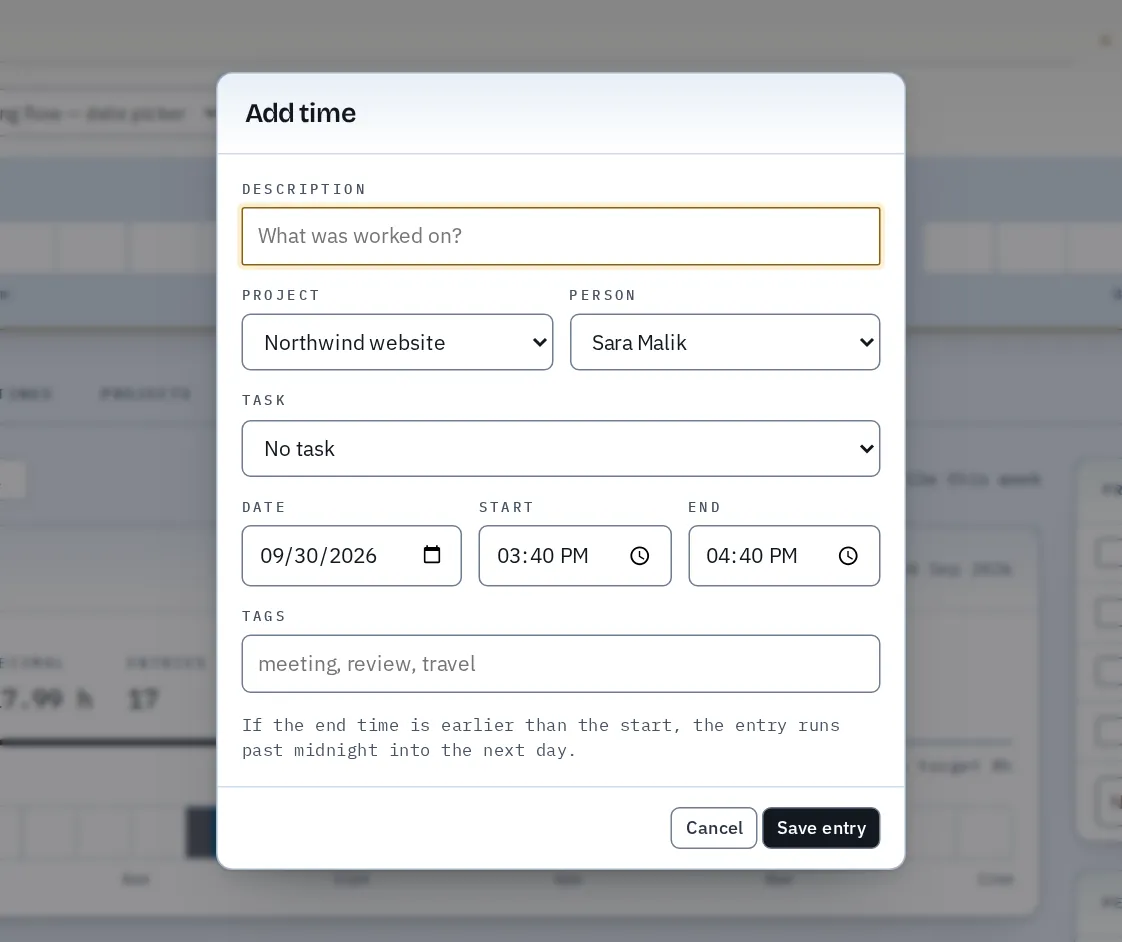
Press Add time (or A) to record time you didn't track live. Set the date, start and end, project, task, person and optional tags. If the end is earlier than the start, the entry runs past midnight.
Focus sessions
Focus runs a timed session (25 minutes by default) followed by a short break. Change the lengths in Settings.
4. Work log views
The Work log answers “where did the time go?” at four zoom levels. Switch with the Day · Week · Month · All buttons or keys 1–4.
Day
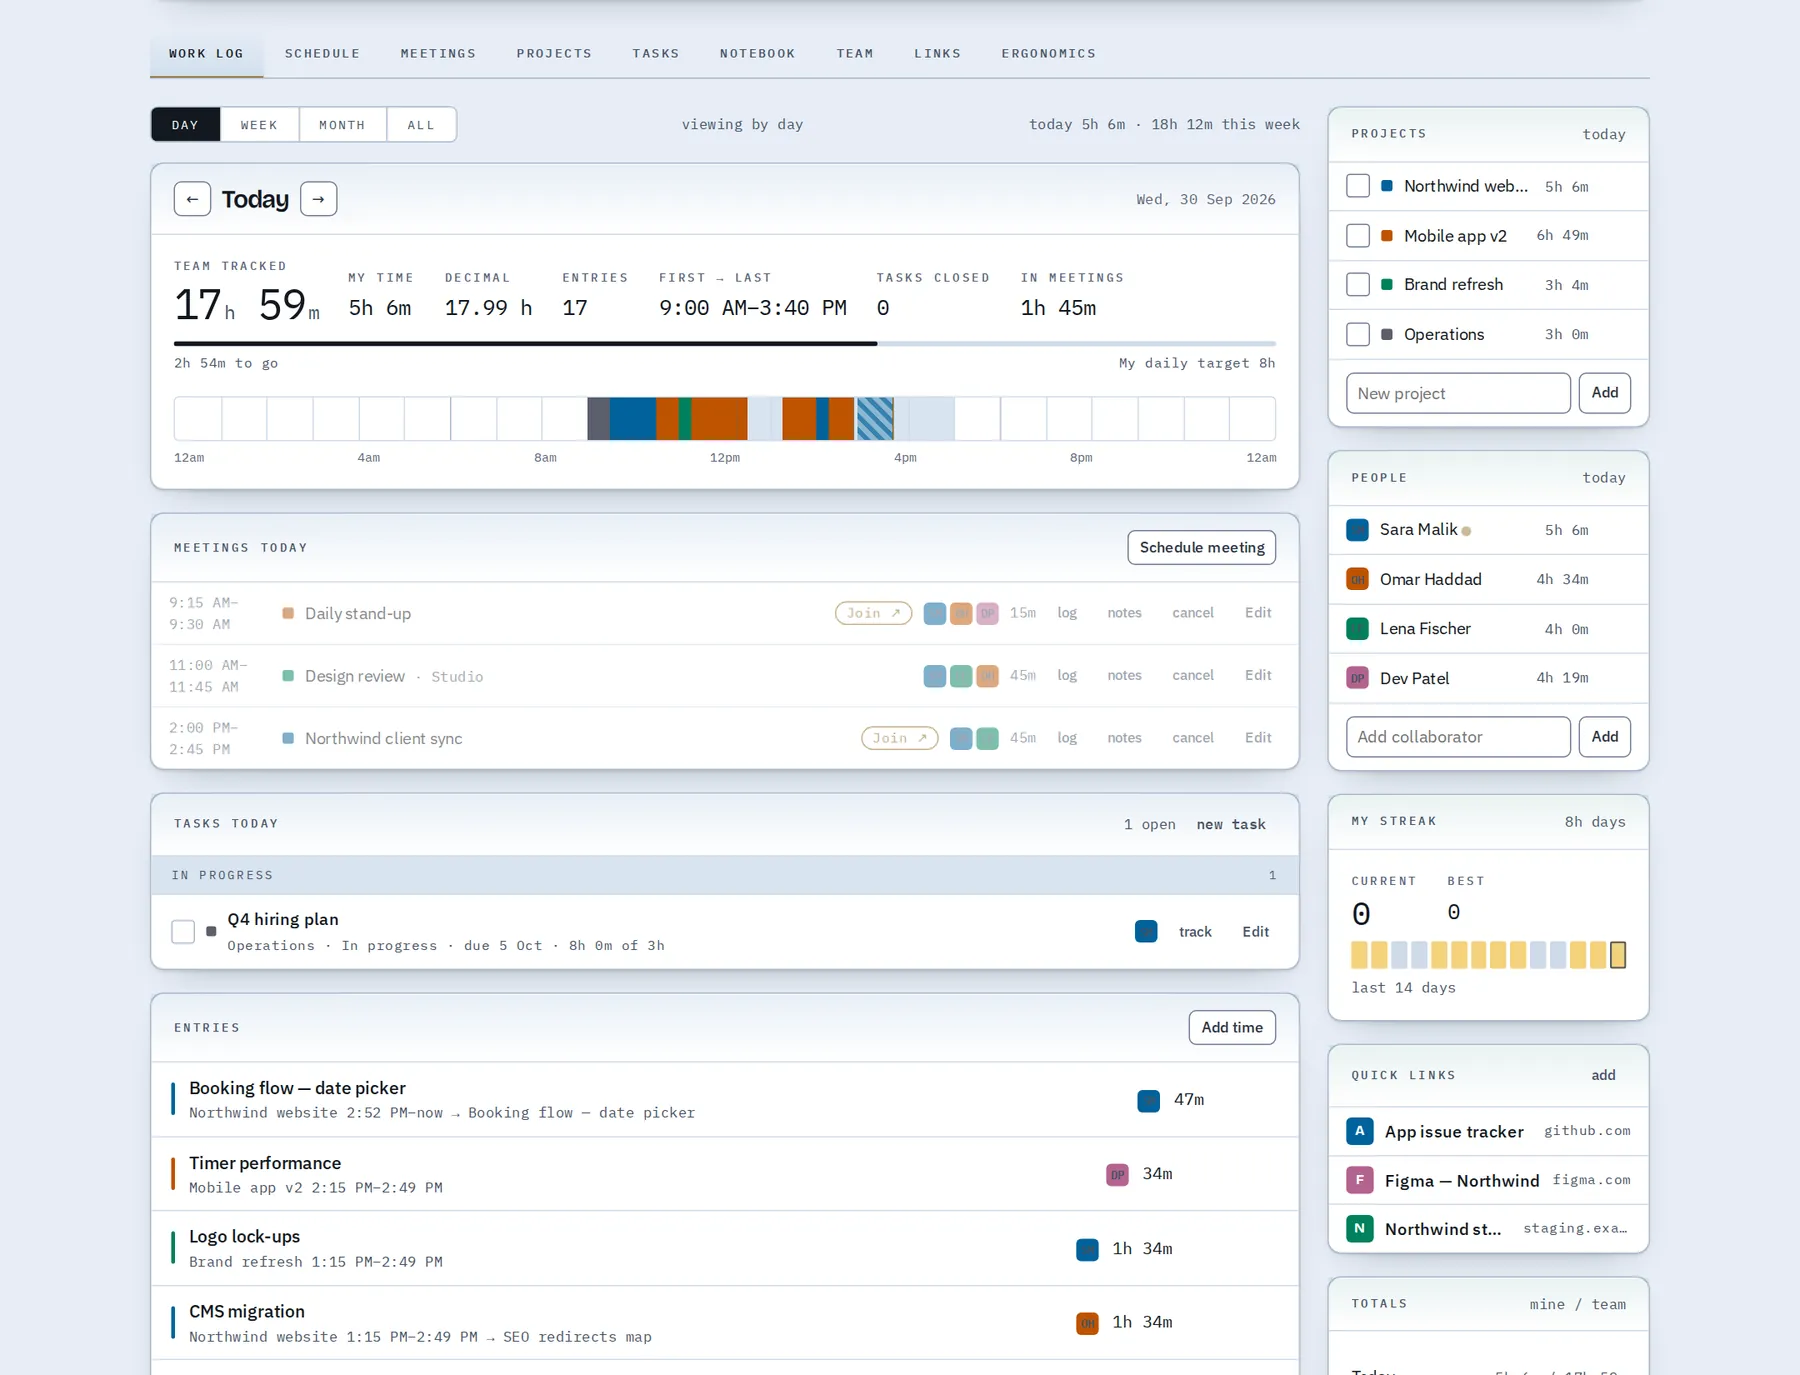
Below the summary you'll find today's meetings, tasks due, and every entry. Use the arrows to move between days. The side panels show hours per project and per person, your 8-hour-day streak, pinned links and running totals.
Week and Month
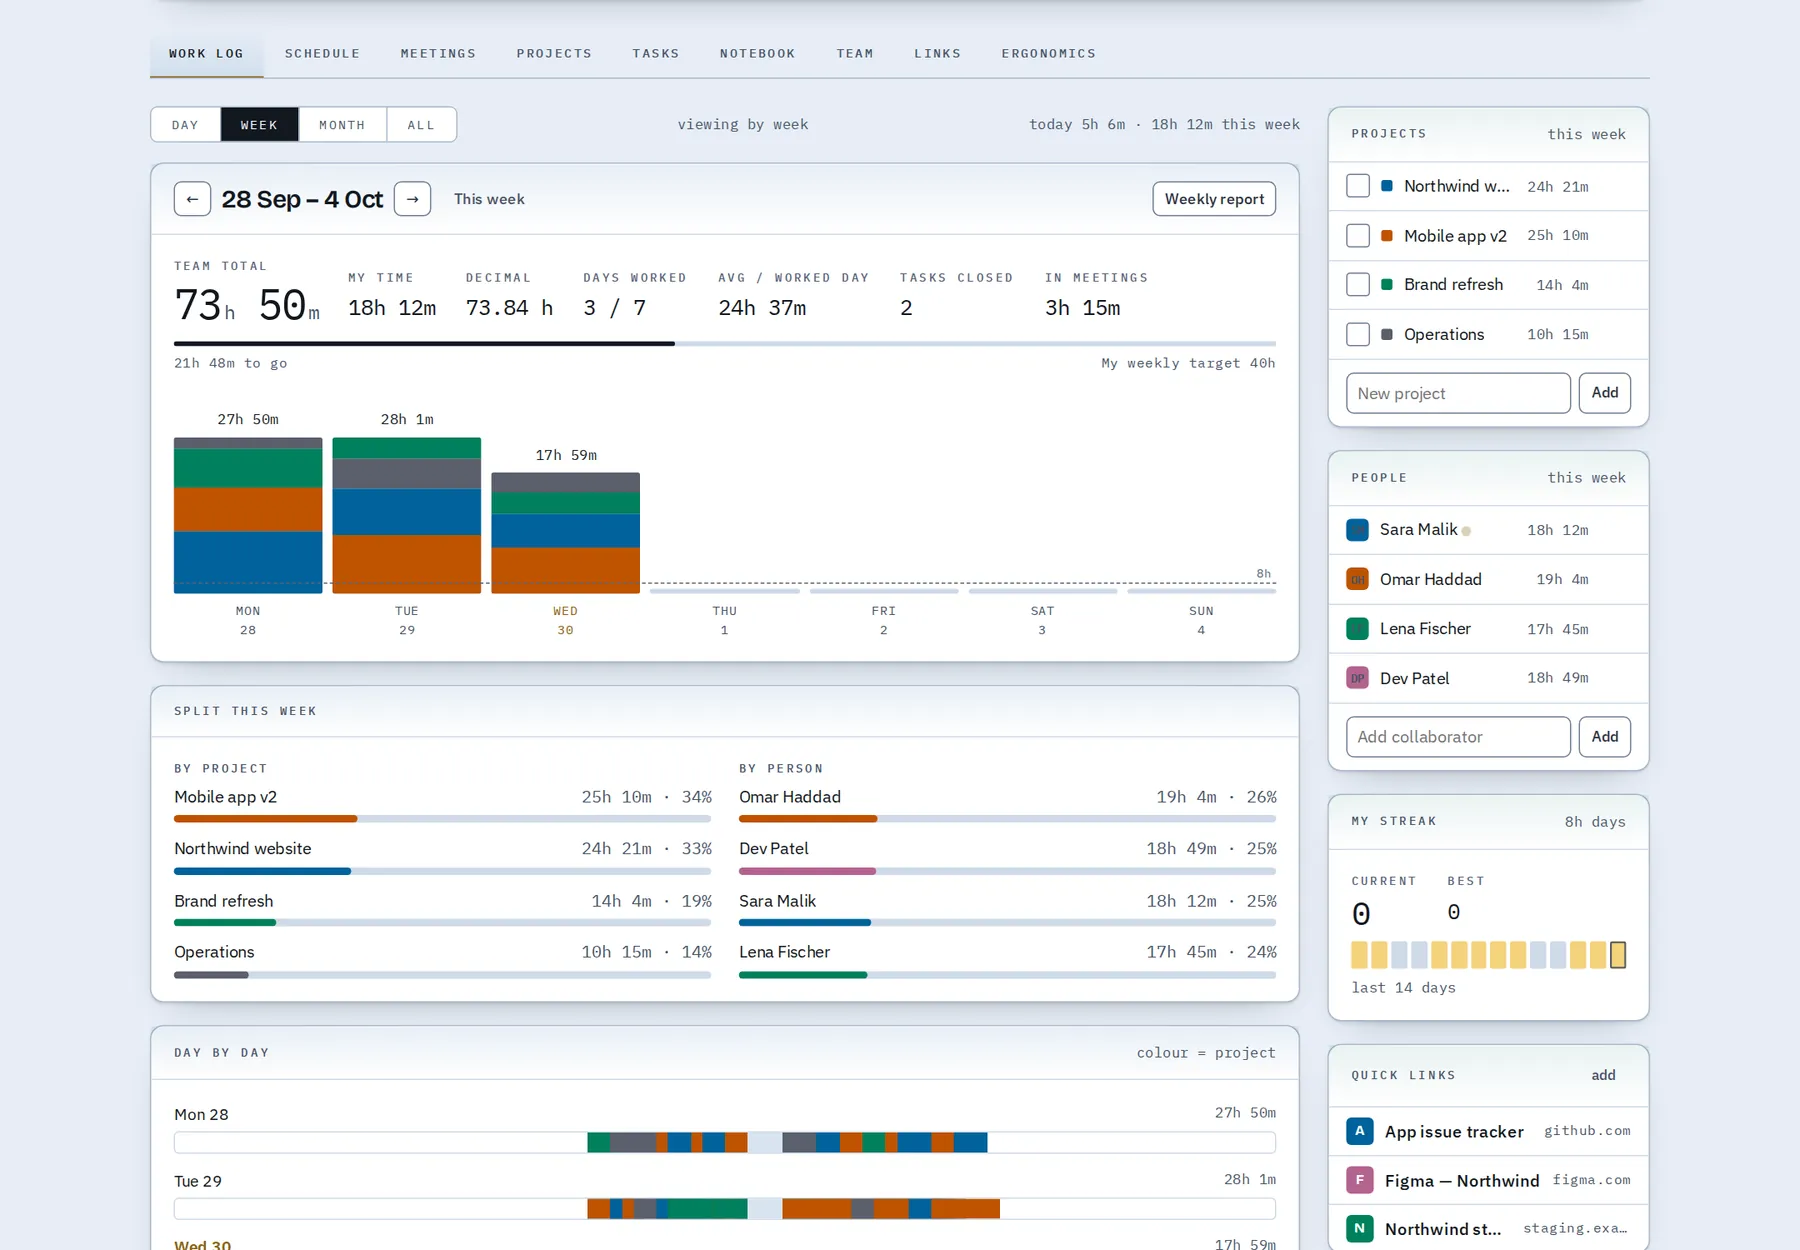
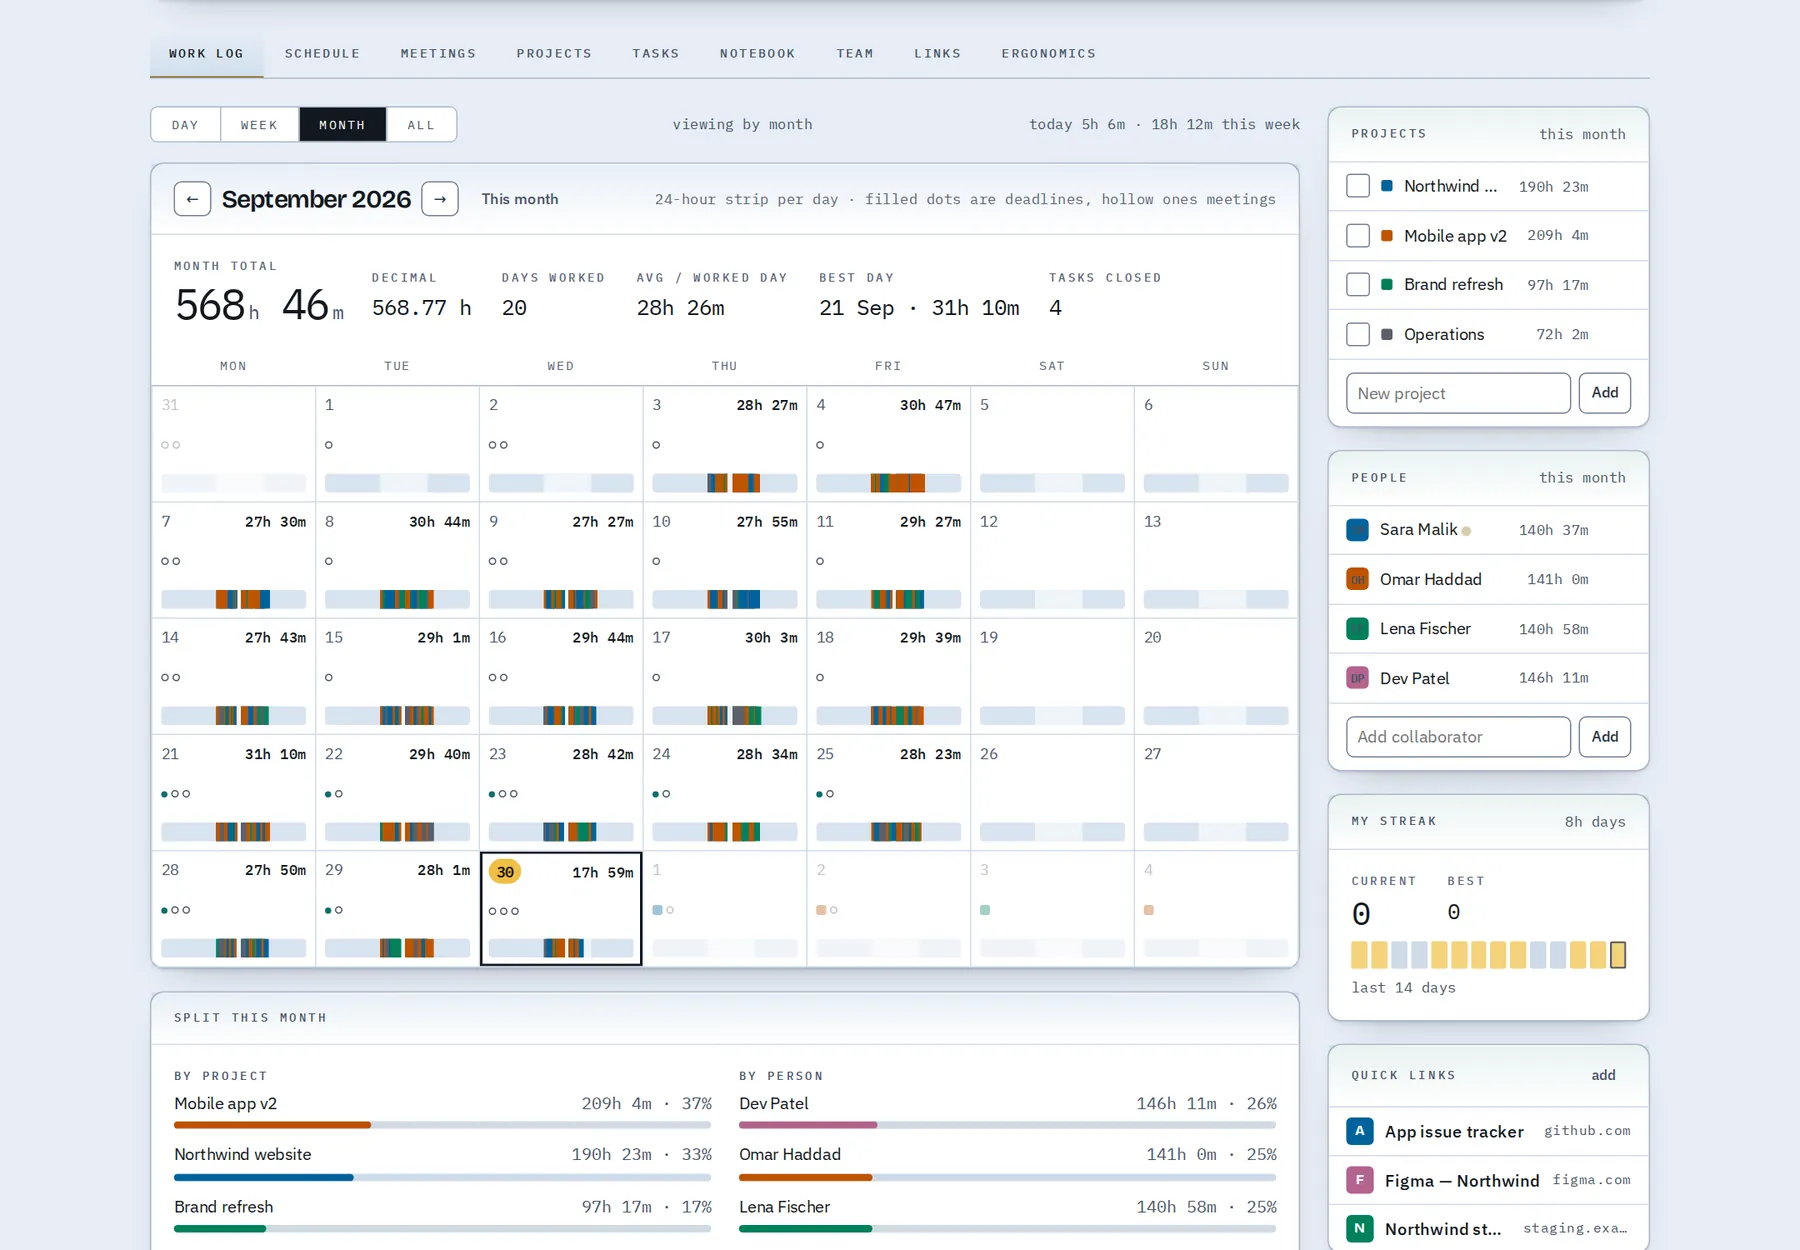
All entries
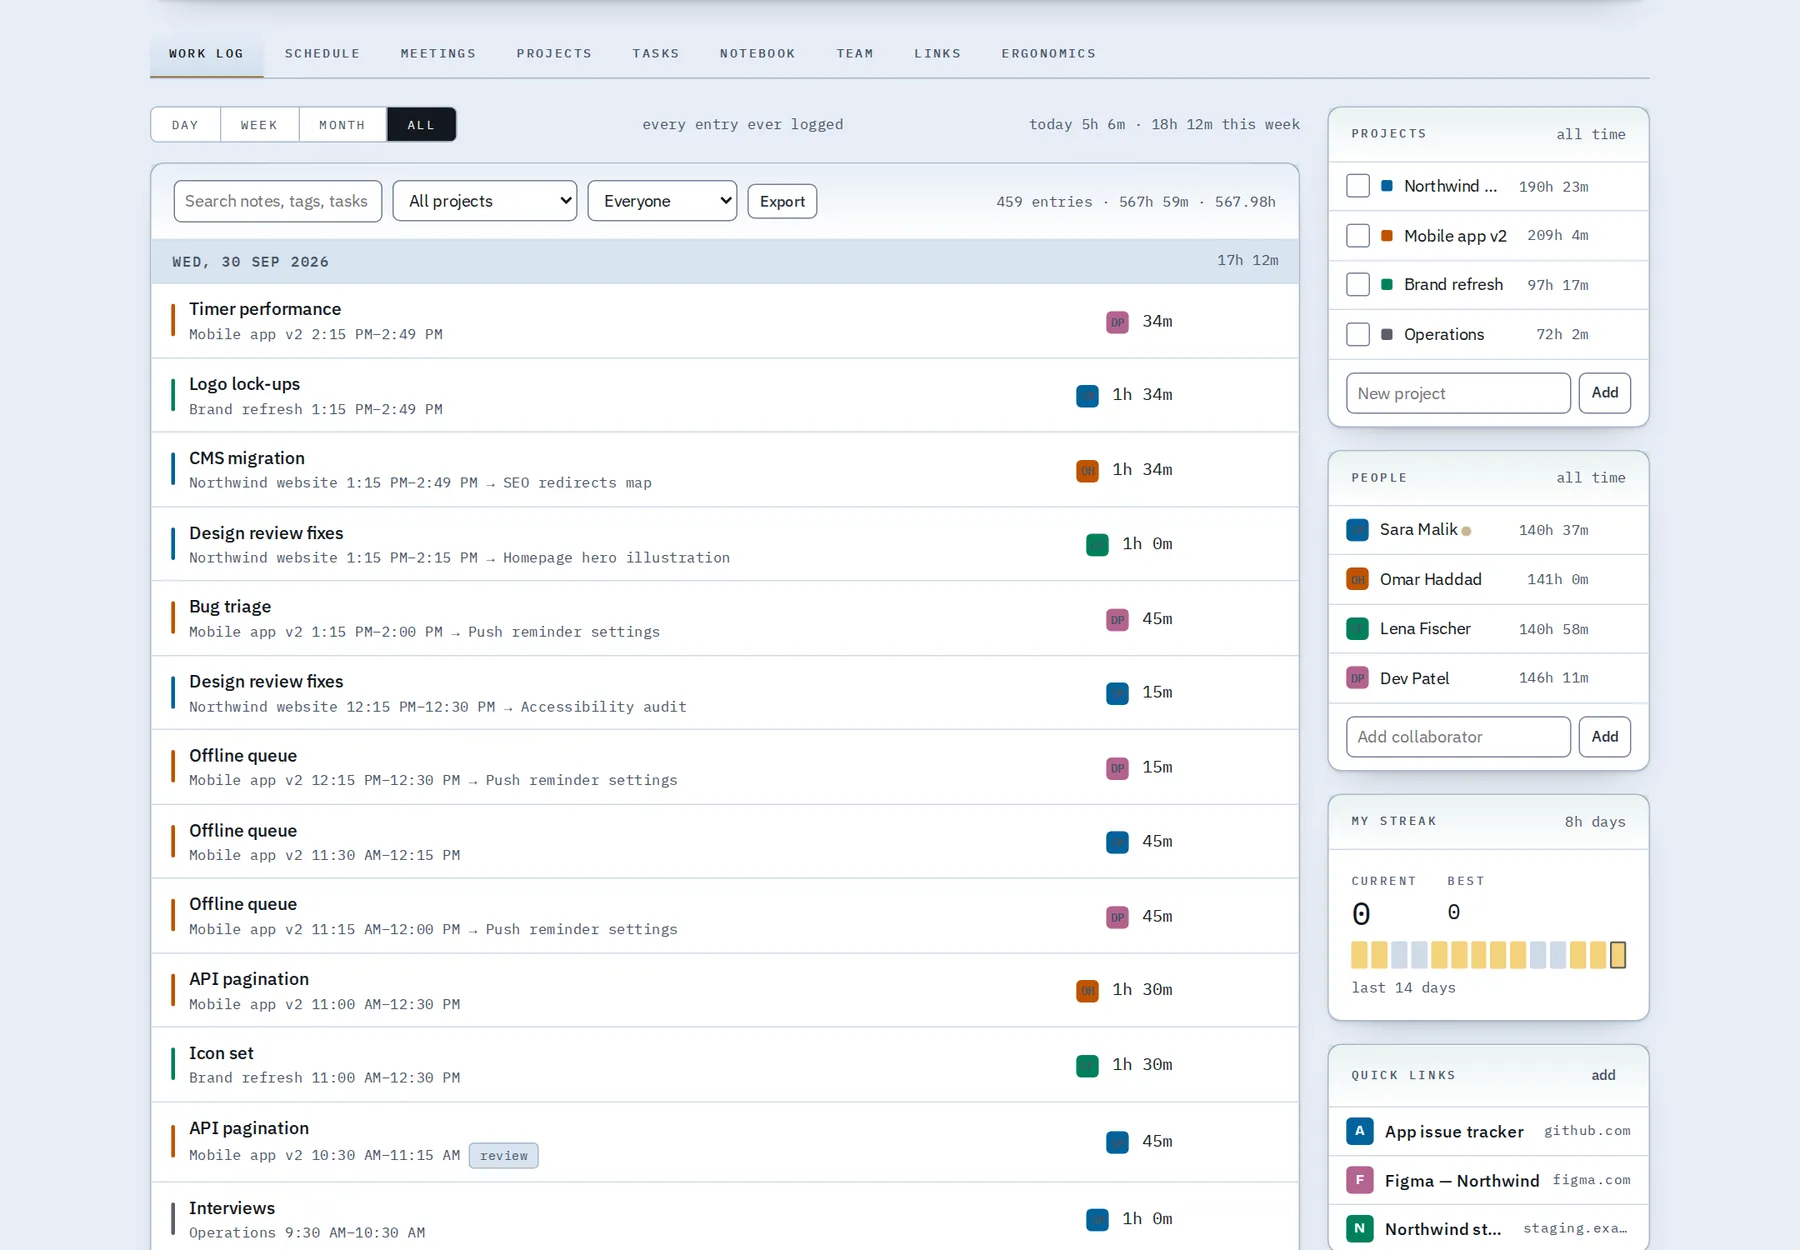
The All view is a searchable list of every entry. Filter by project, person or text and export to CSV.
5. Schedule: plan your day
The Schedule tab is a time-blocked planner. Blocks are intentions — the timer still counts what really happened — so you can compare plan with reality.
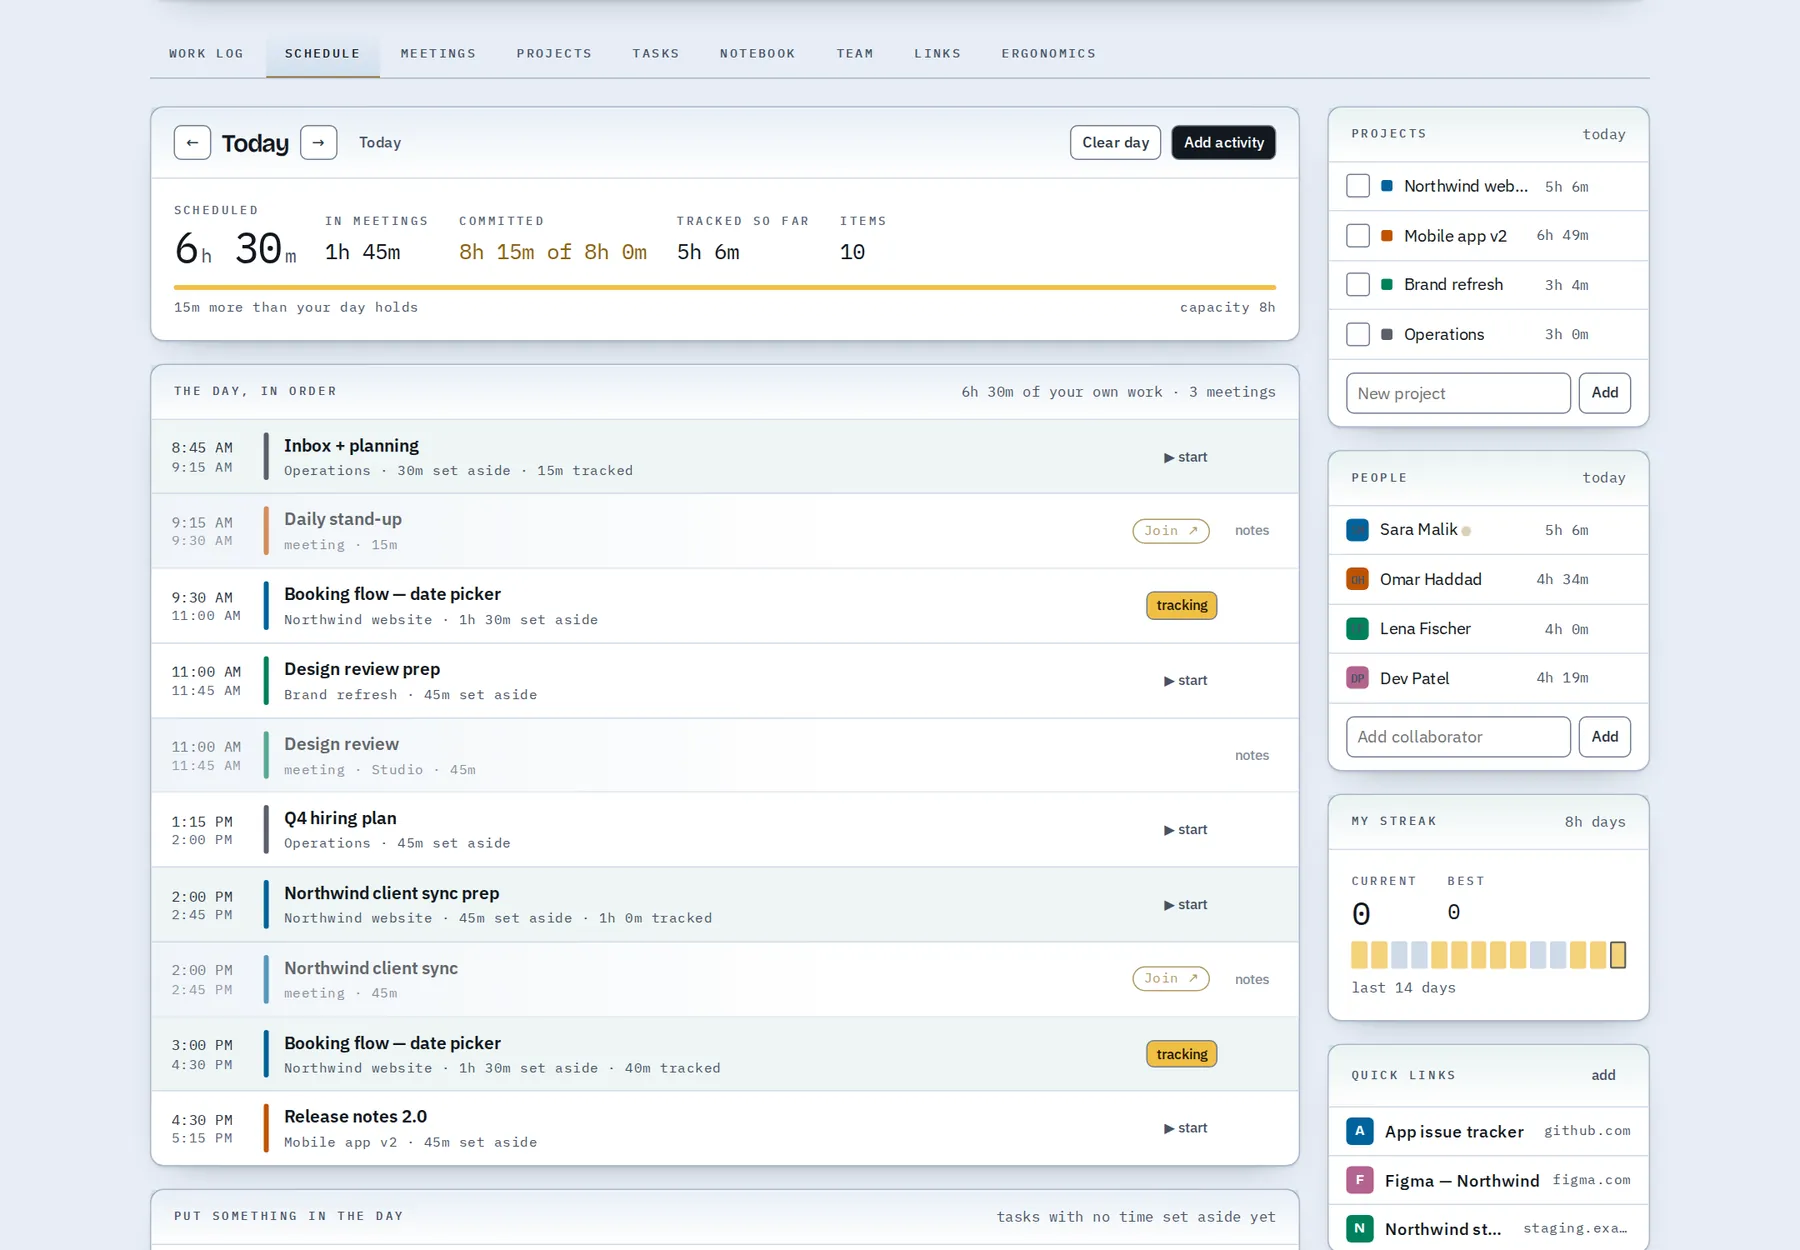
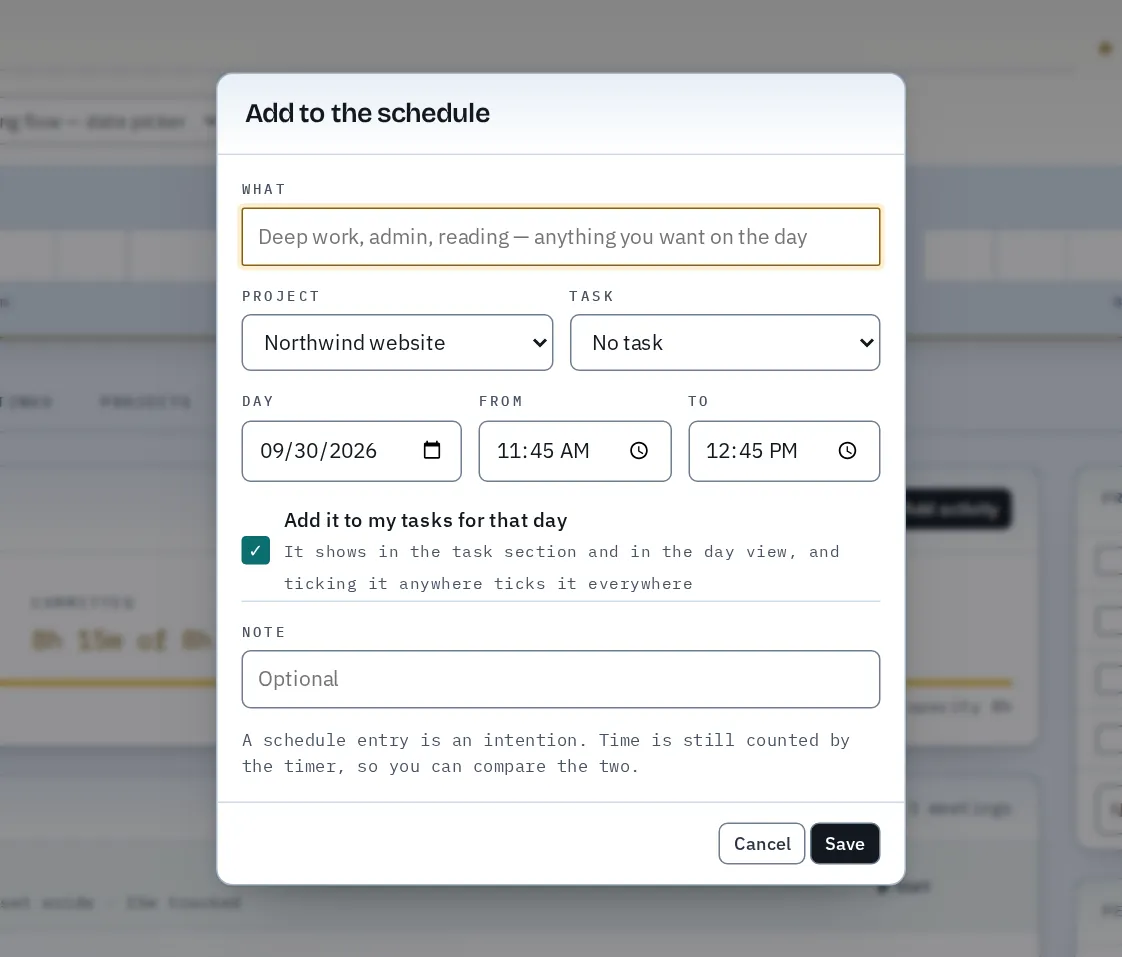
- Press Add activity, name it, pick a project (and task), and set the start and end.
- Meetings appear automatically in the day's timeline, so you plan around them.
- Press start on a block to begin tracking it straight away.
- From the list of open tasks on the right, schedule a task into the next free slot sized to its estimate.
New activities are also added to your tasks for that day (untick Add it to my tasks for that day if you don't want that). The block and the task stay in step: tick it in one place and it's ticked everywhere.
6. Daily check-in
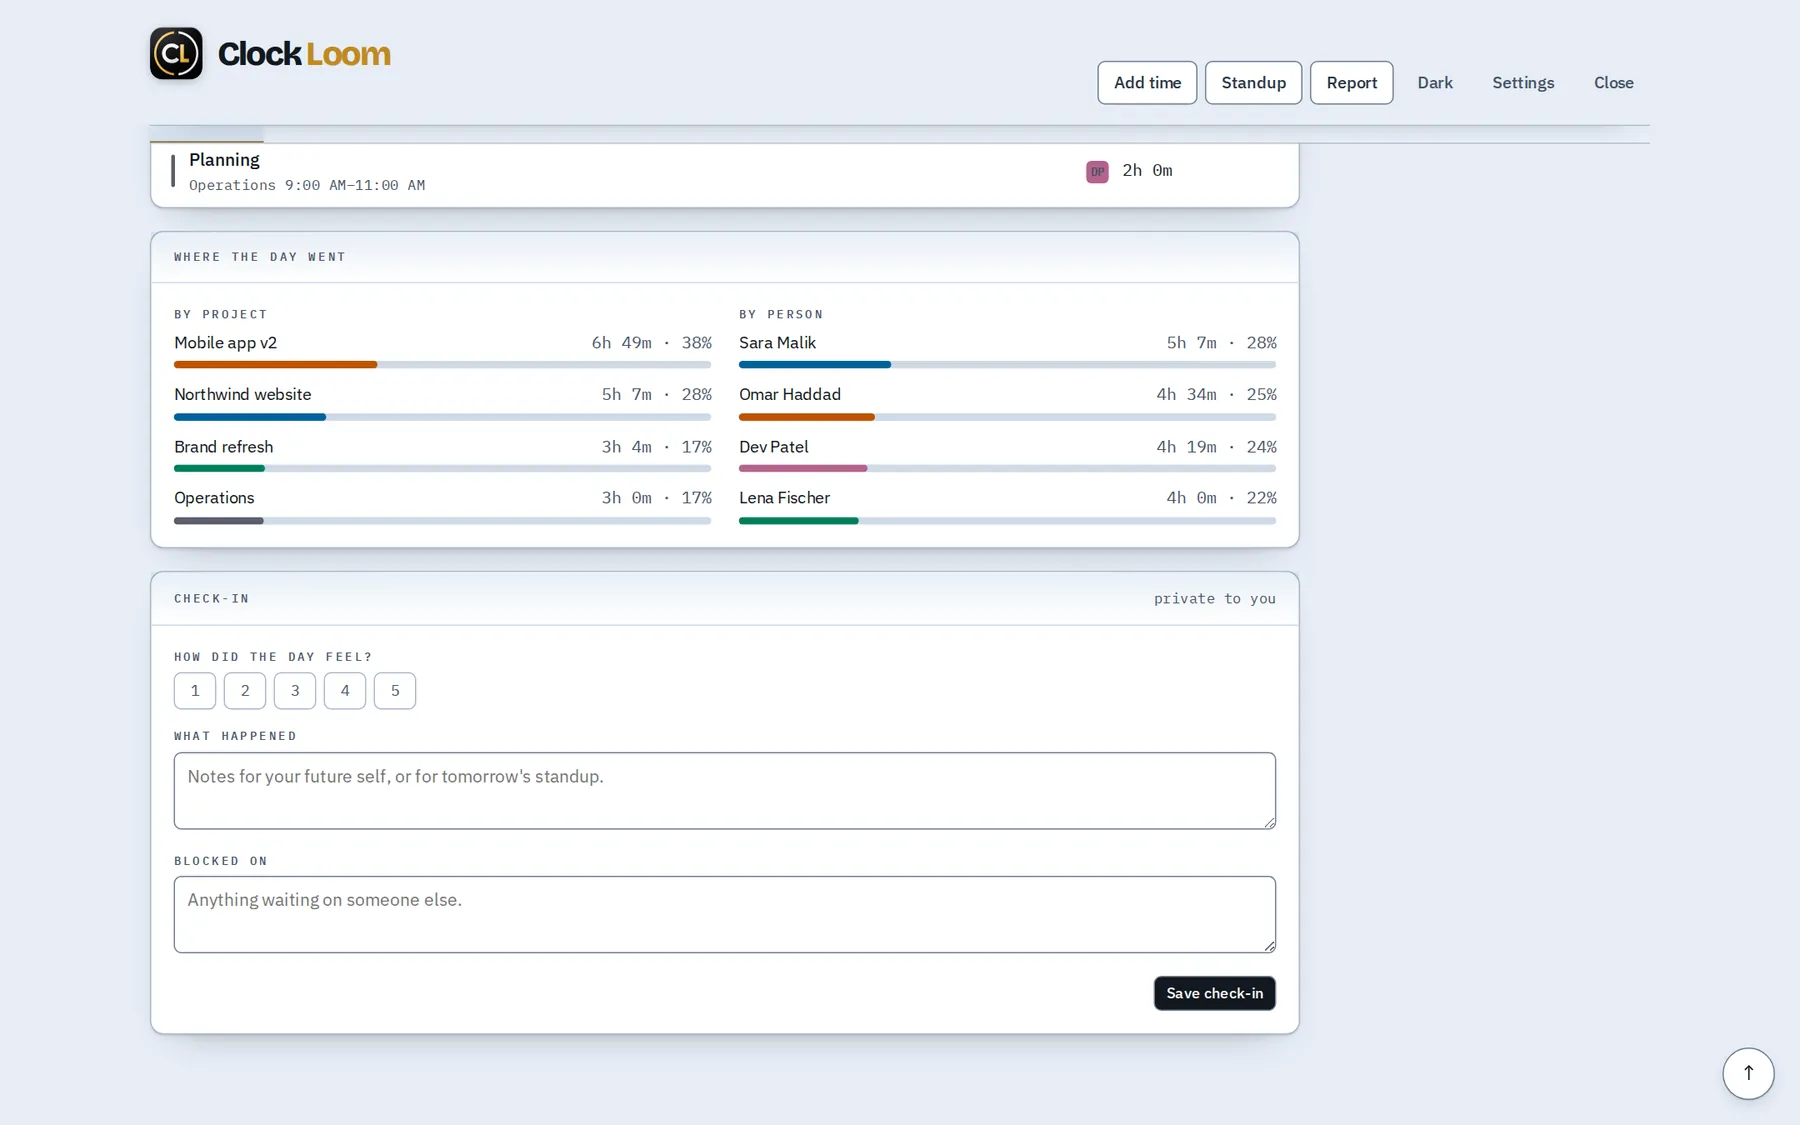
At the end of the Work log's day view there's a private check-in: rate how the day felt from 1–5, note what happened and anything you're blocked on. Your standup notes pick these up automatically.
7. Meetings
The Meetings tab shows a weekly calendar with a line for the current time. Press Schedule meeting (or M) to add one.
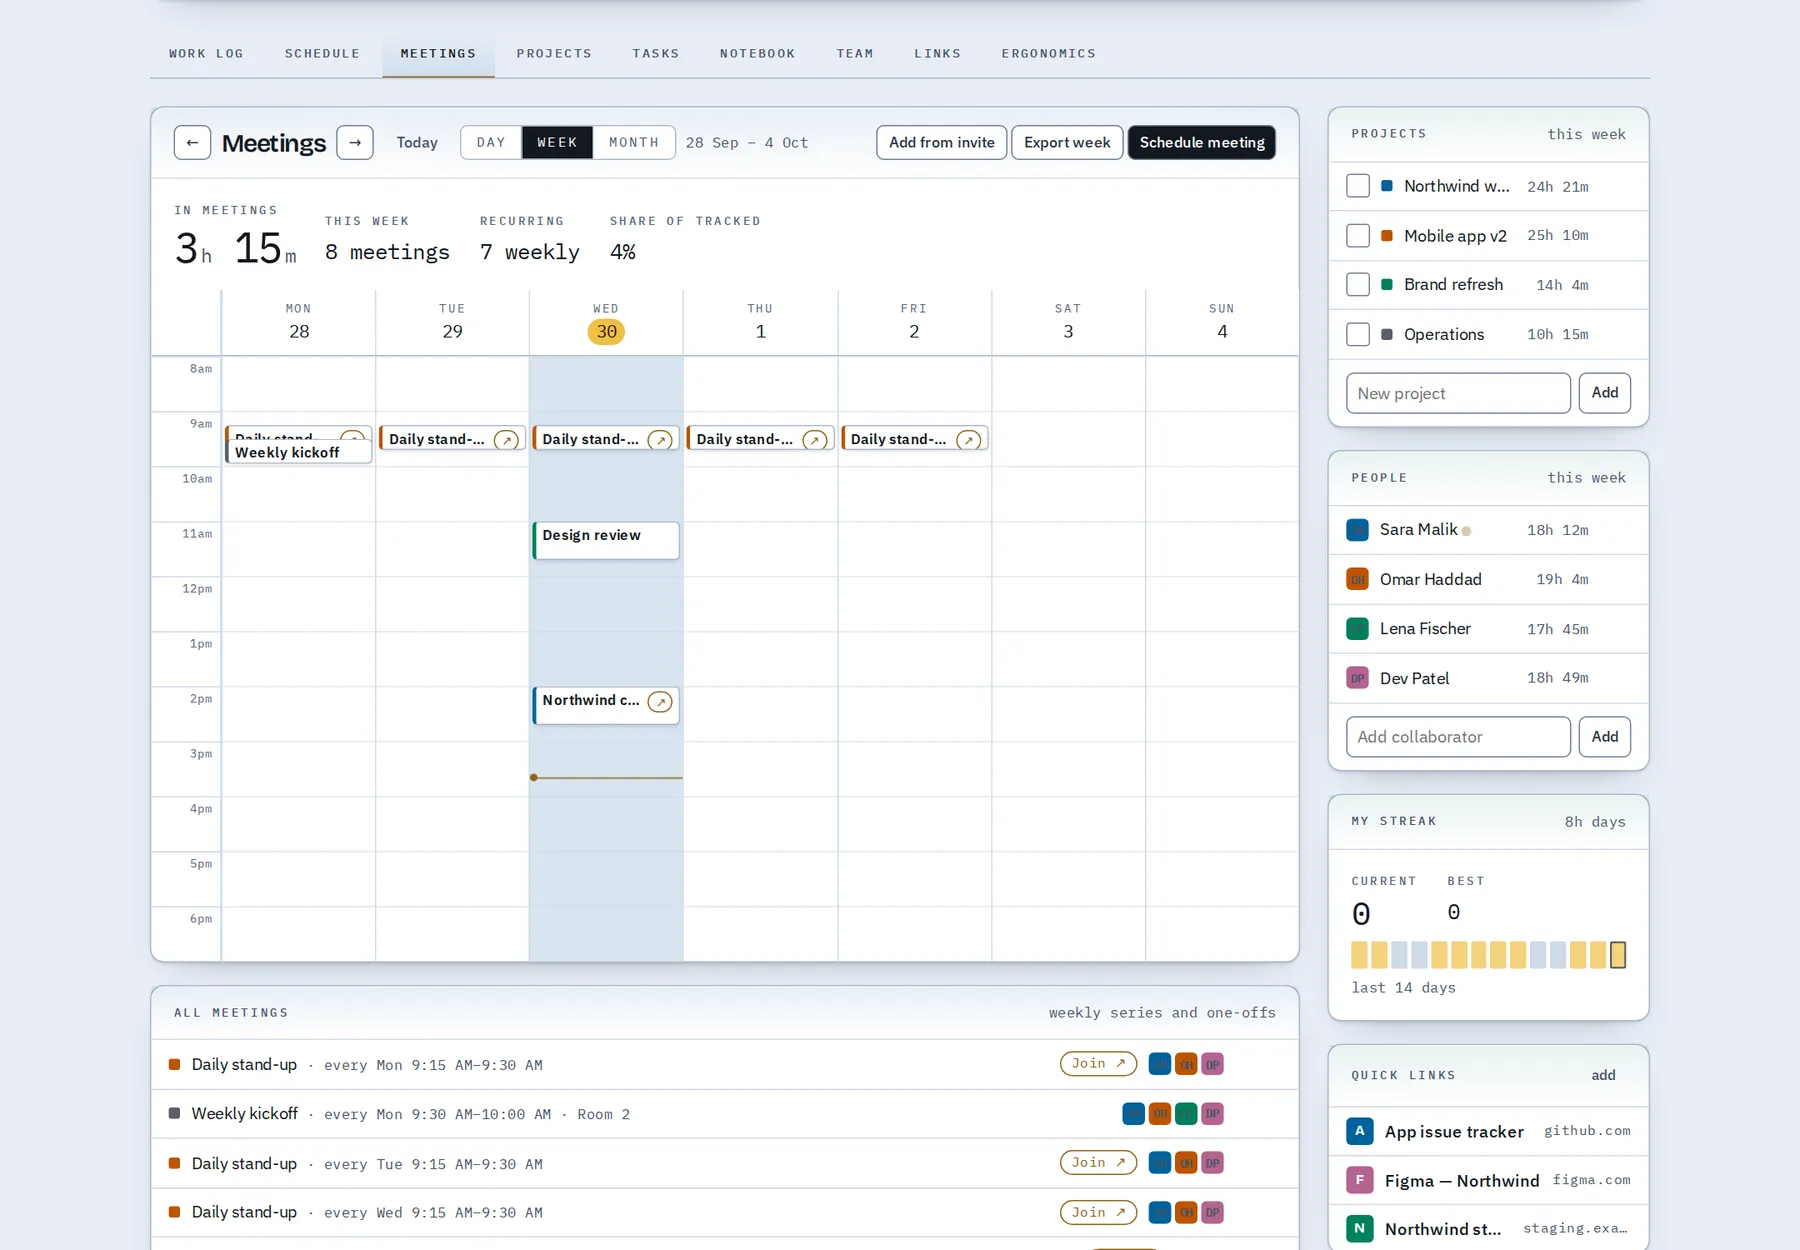
- Give it a title, a project and choose Every week or Once.
- Pick the day, start and end, and tick the attendees.
- Paste a Zoom/Meet/Teams link — it becomes a Join button — and add a room or notes.
- Choose when to be reminded with Notify me. At that time, a card appears showing the room and the join link.
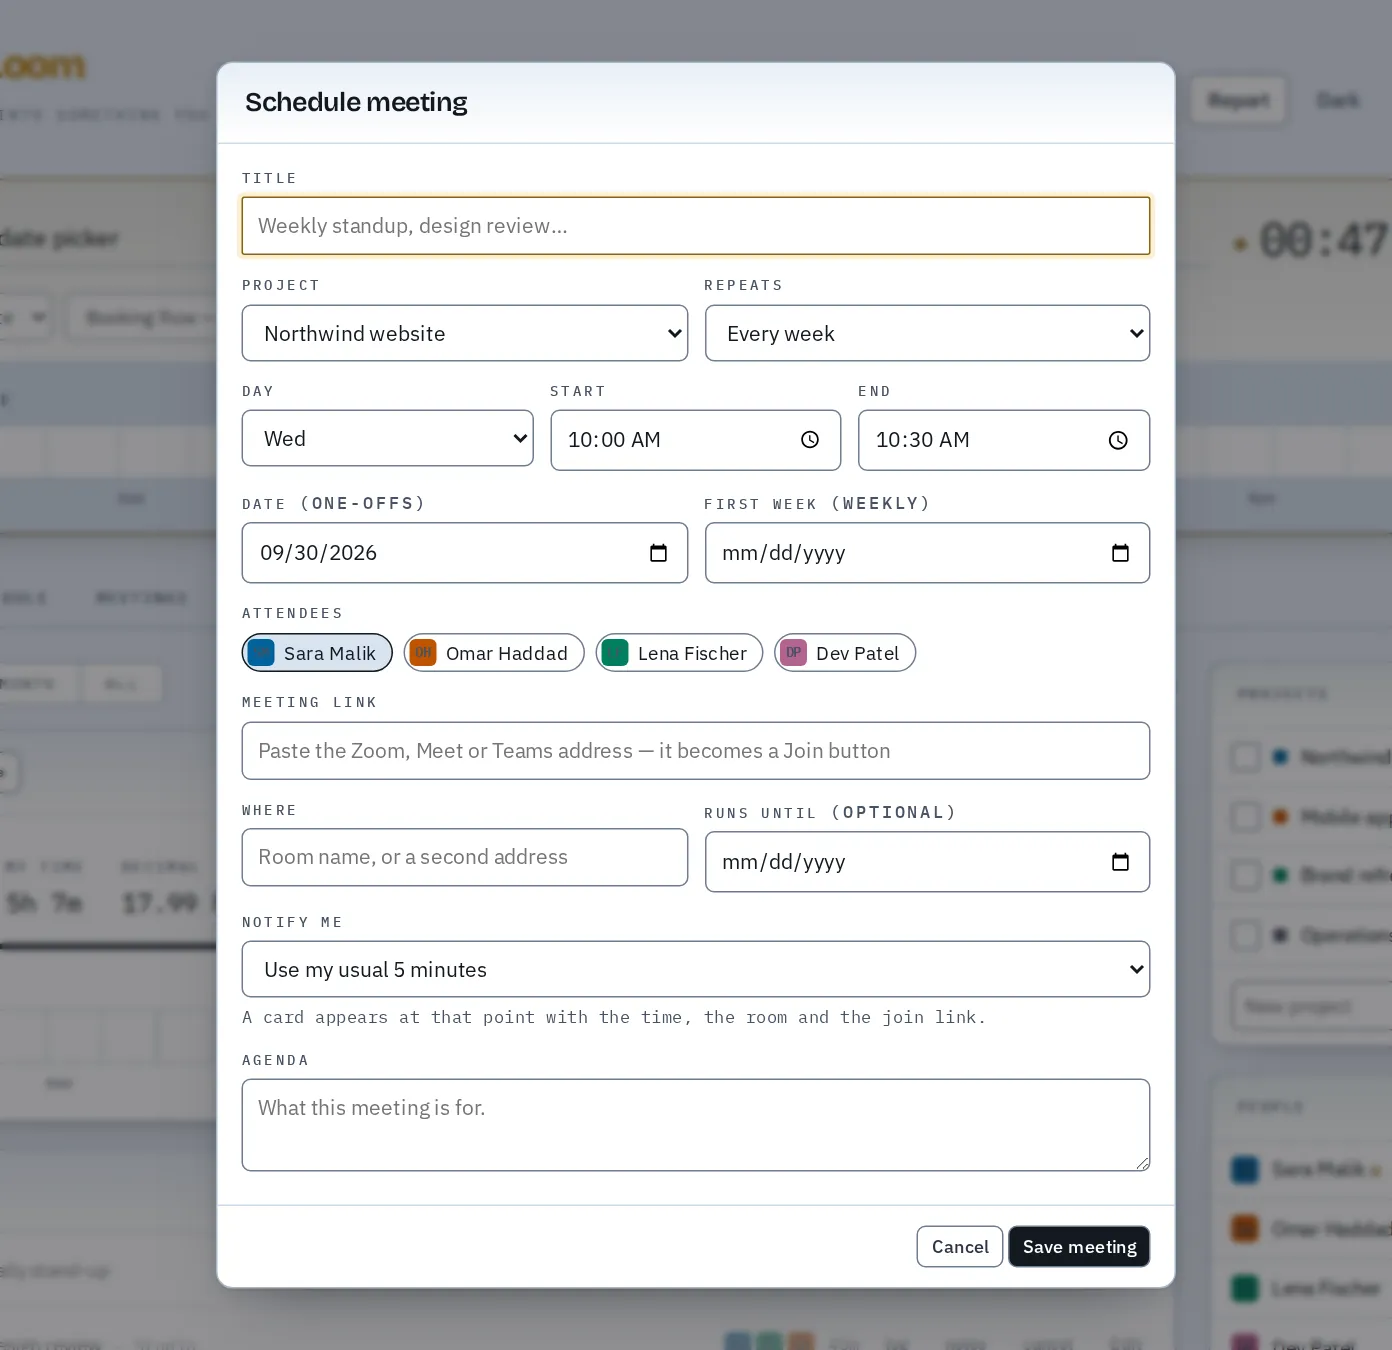
On each meeting you can log its time in one click, write notes (turn lines into tasks), cancel one occurrence, or edit the series.
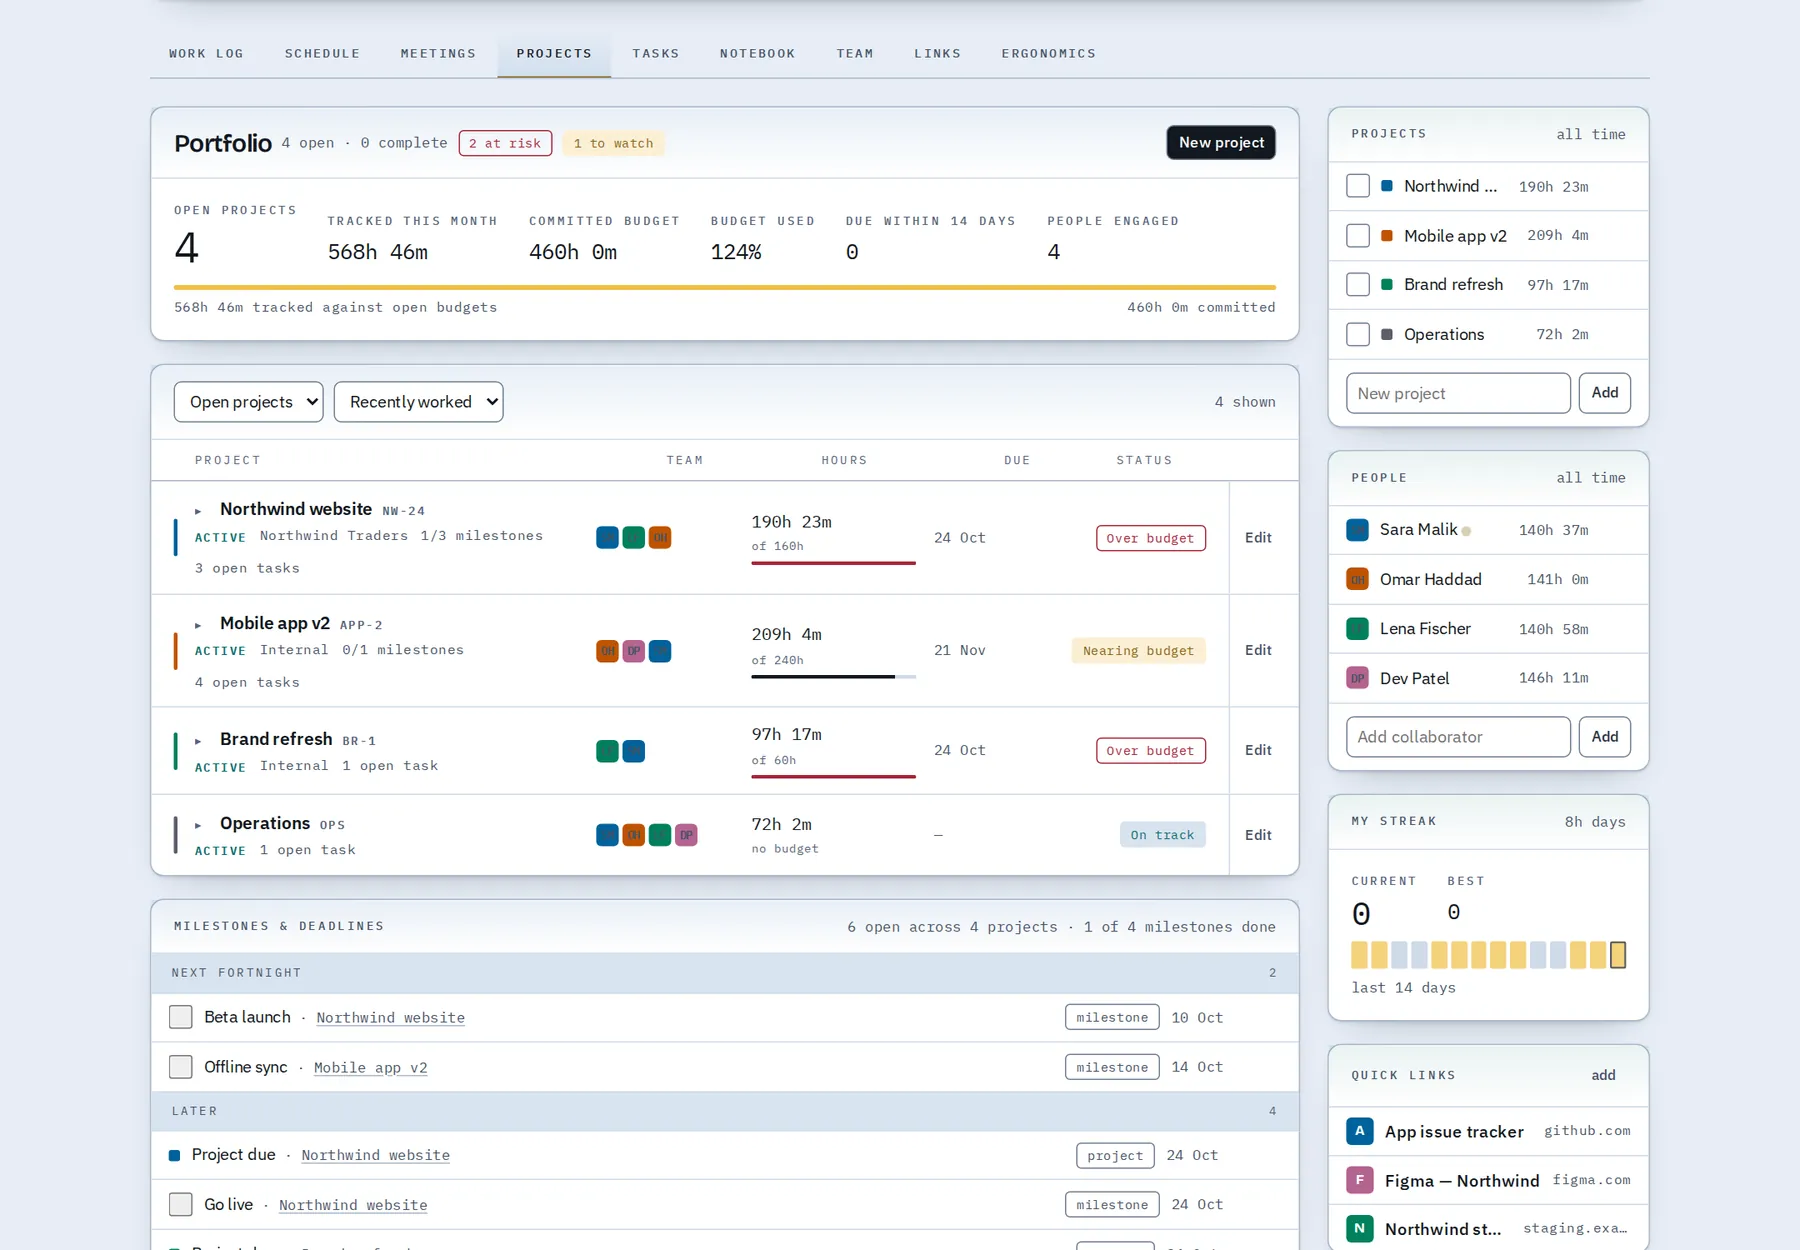
8. Projects
Projects give your time a home. Each has a colour, code, client, lead, team, start and due dates, an hour budget, a brief and milestones.
Inside a project
Click a project's name to open its page: hours tracked this month and week against budget, client, lead and dates, the brief, milestones, who has worked on it, documents, notes, meetings and the latest entries. Copy summary gives you a ready-to-paste status update.
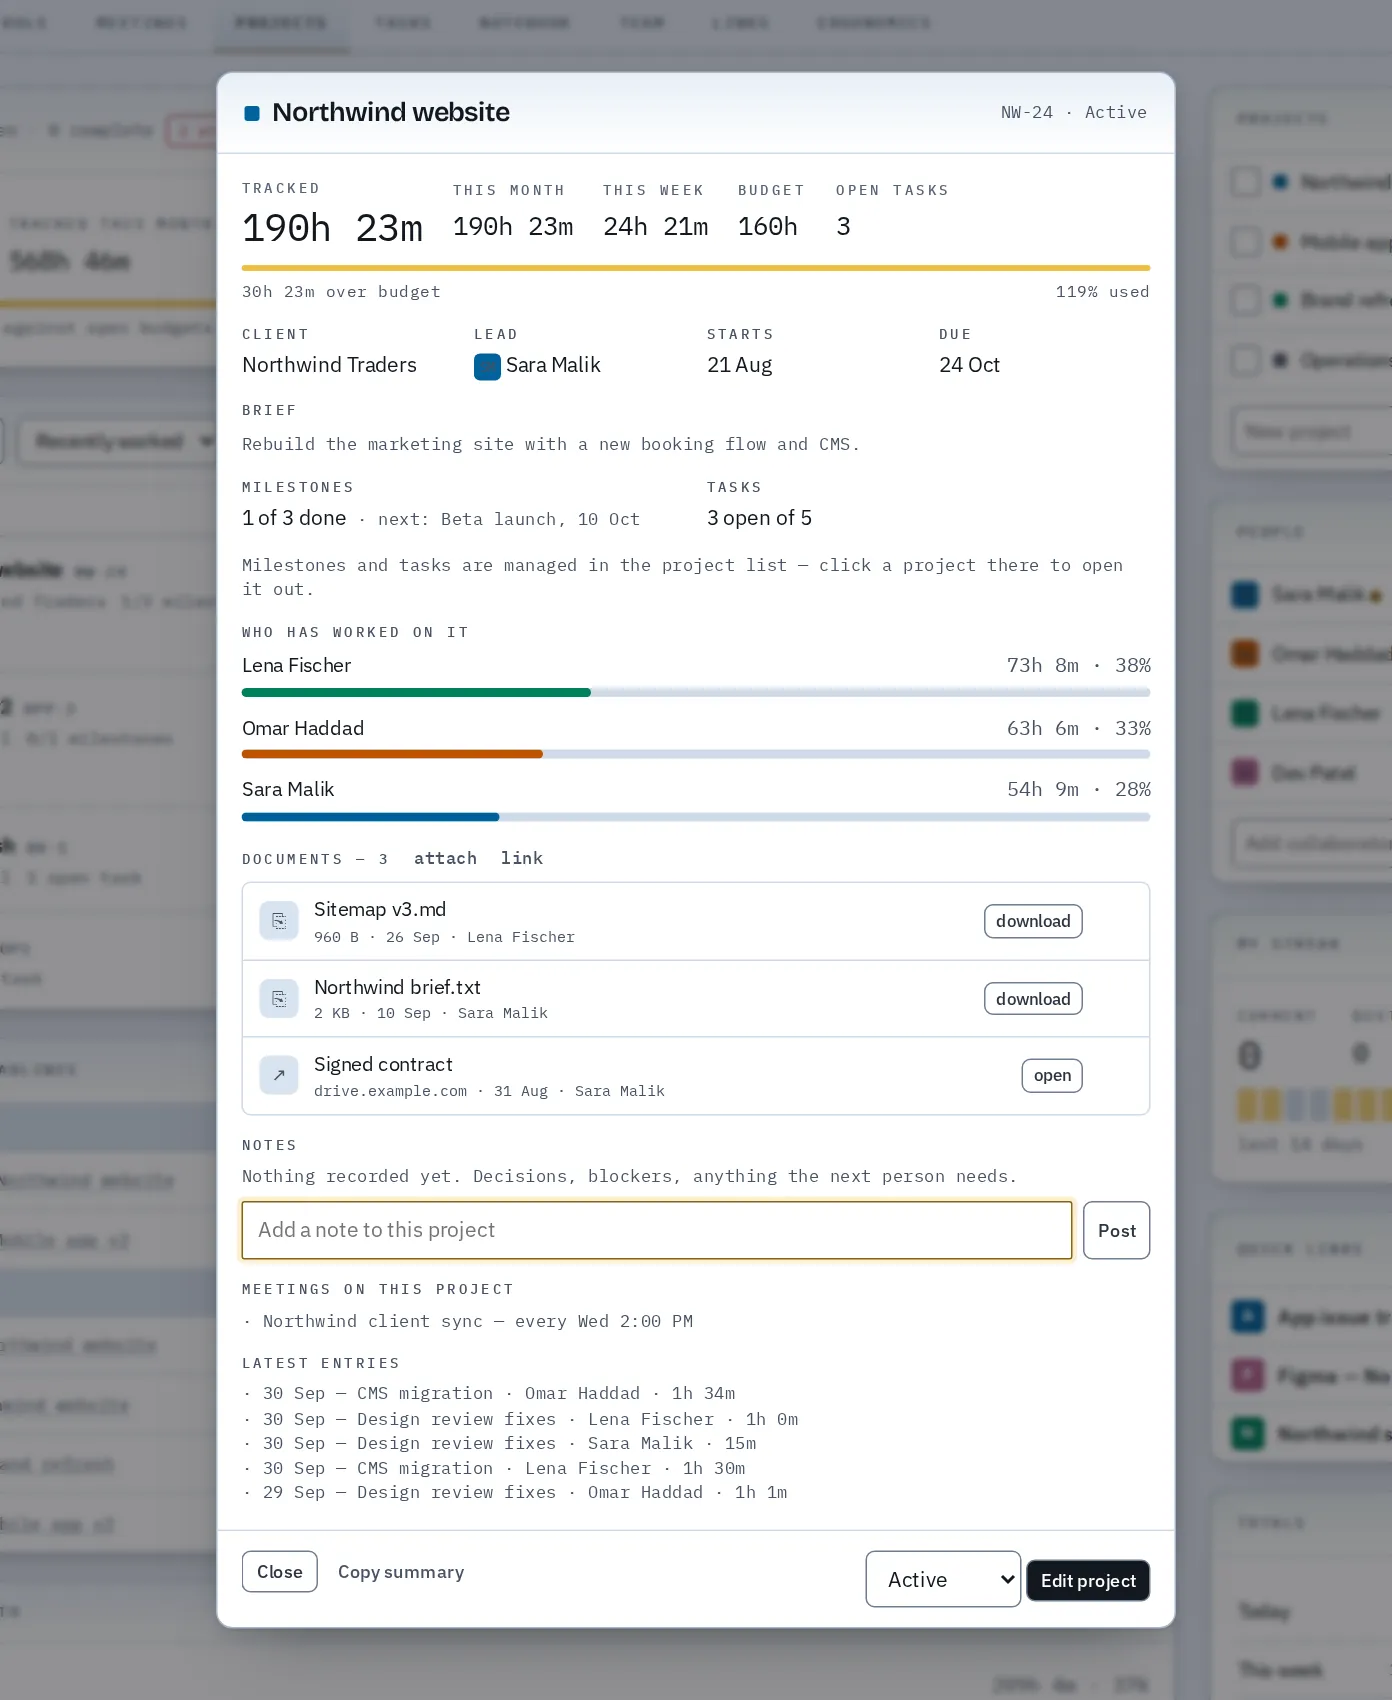
- Documents: press attach to upload a file (up to 25 MB) or link to point to a document that lives elsewhere, such as Google Drive or SharePoint. Uploaded files are saved to your Clock Loom account, so you can download them on any device you sign in from.
- Milestones: add a milestone with a due date, then open it to rename it, add a note, or mark it achieved. Achieved milestones move to their own list.
- Notes: post short updates (decisions, blockers, anything the next person needs to know) and they're kept with the project.
- Press New project to add one, or type a name in the Projects side panel and press Add.
- Set status to Planning, Active, On hold or Complete. Completed projects drop out of the timer's list but keep their history.
- The budget bar fills as hours are logged and turns red when a project goes over budget.
9. Tasks & board
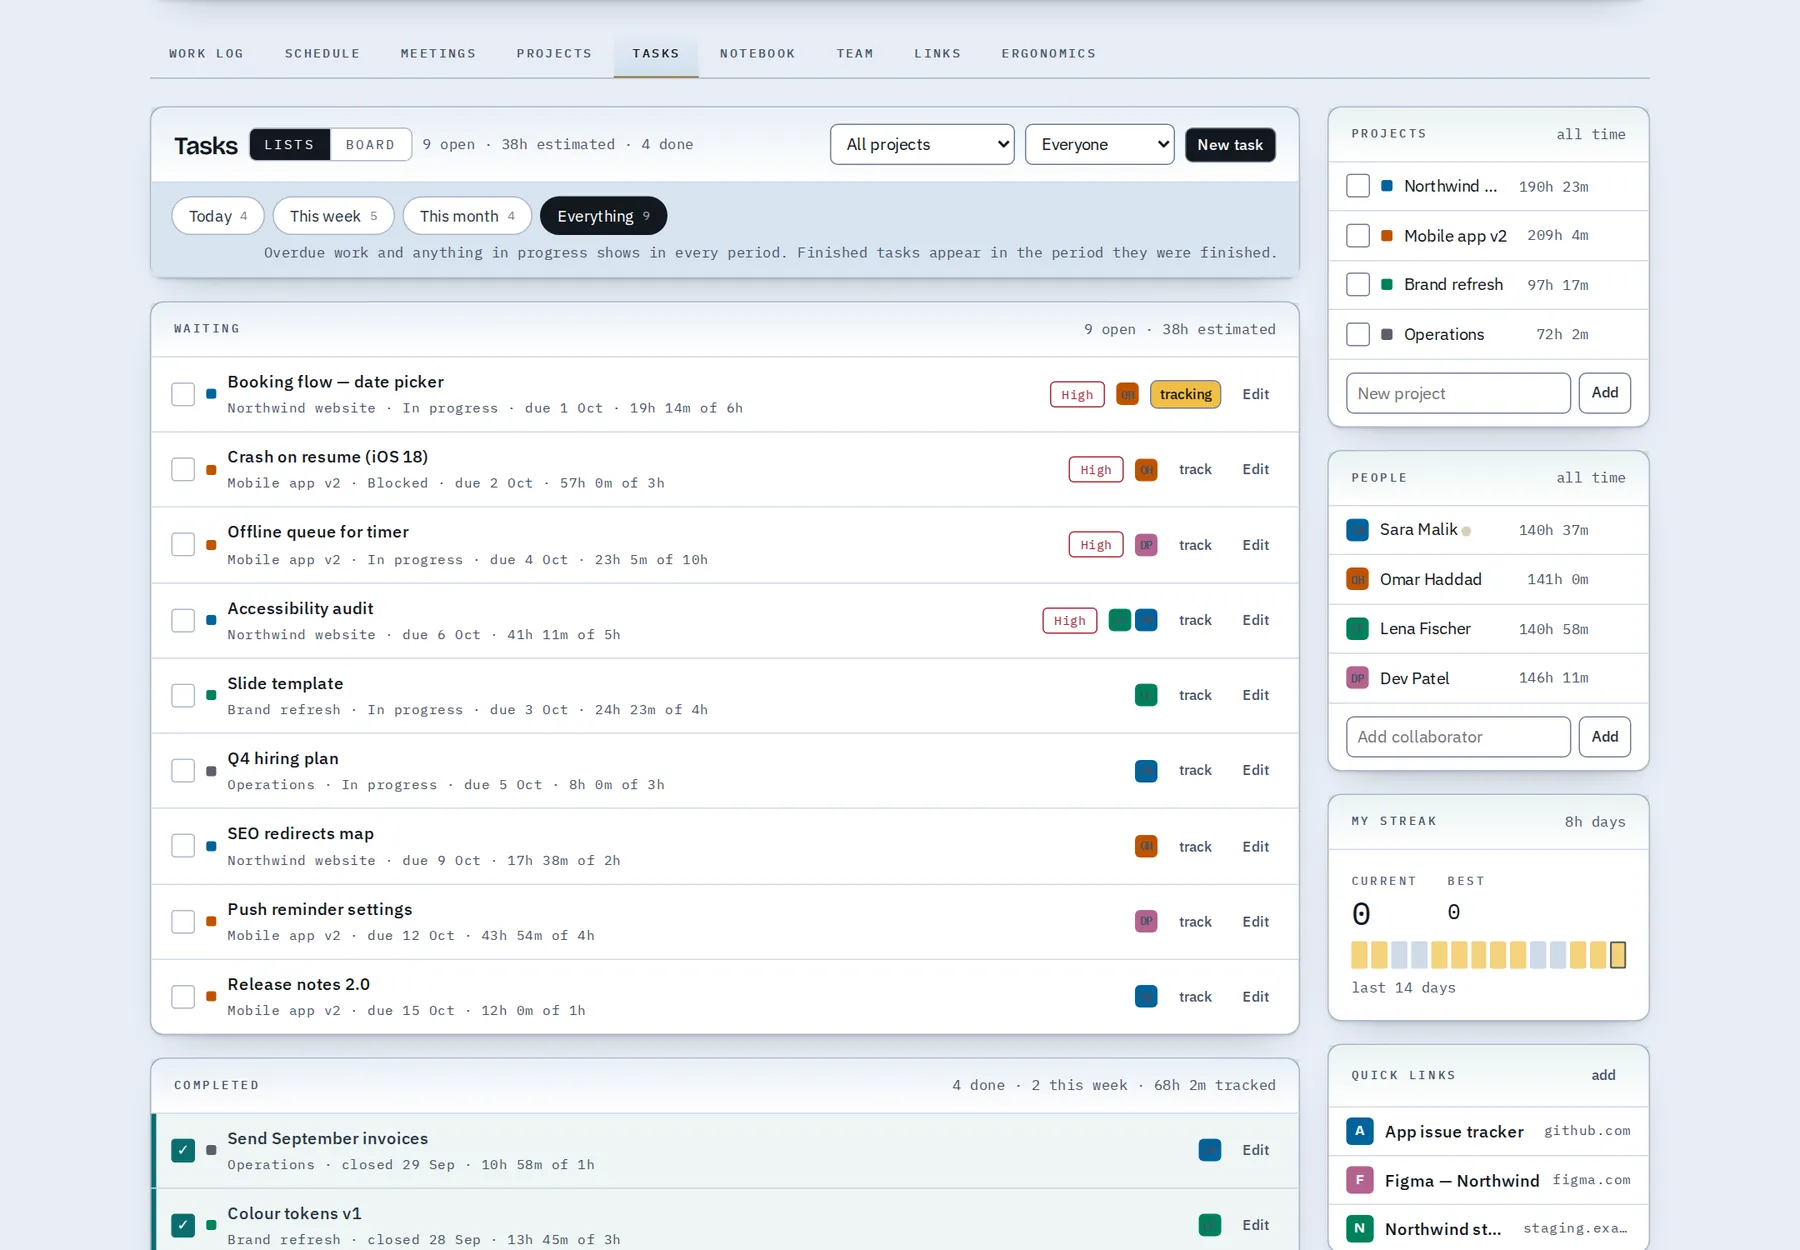
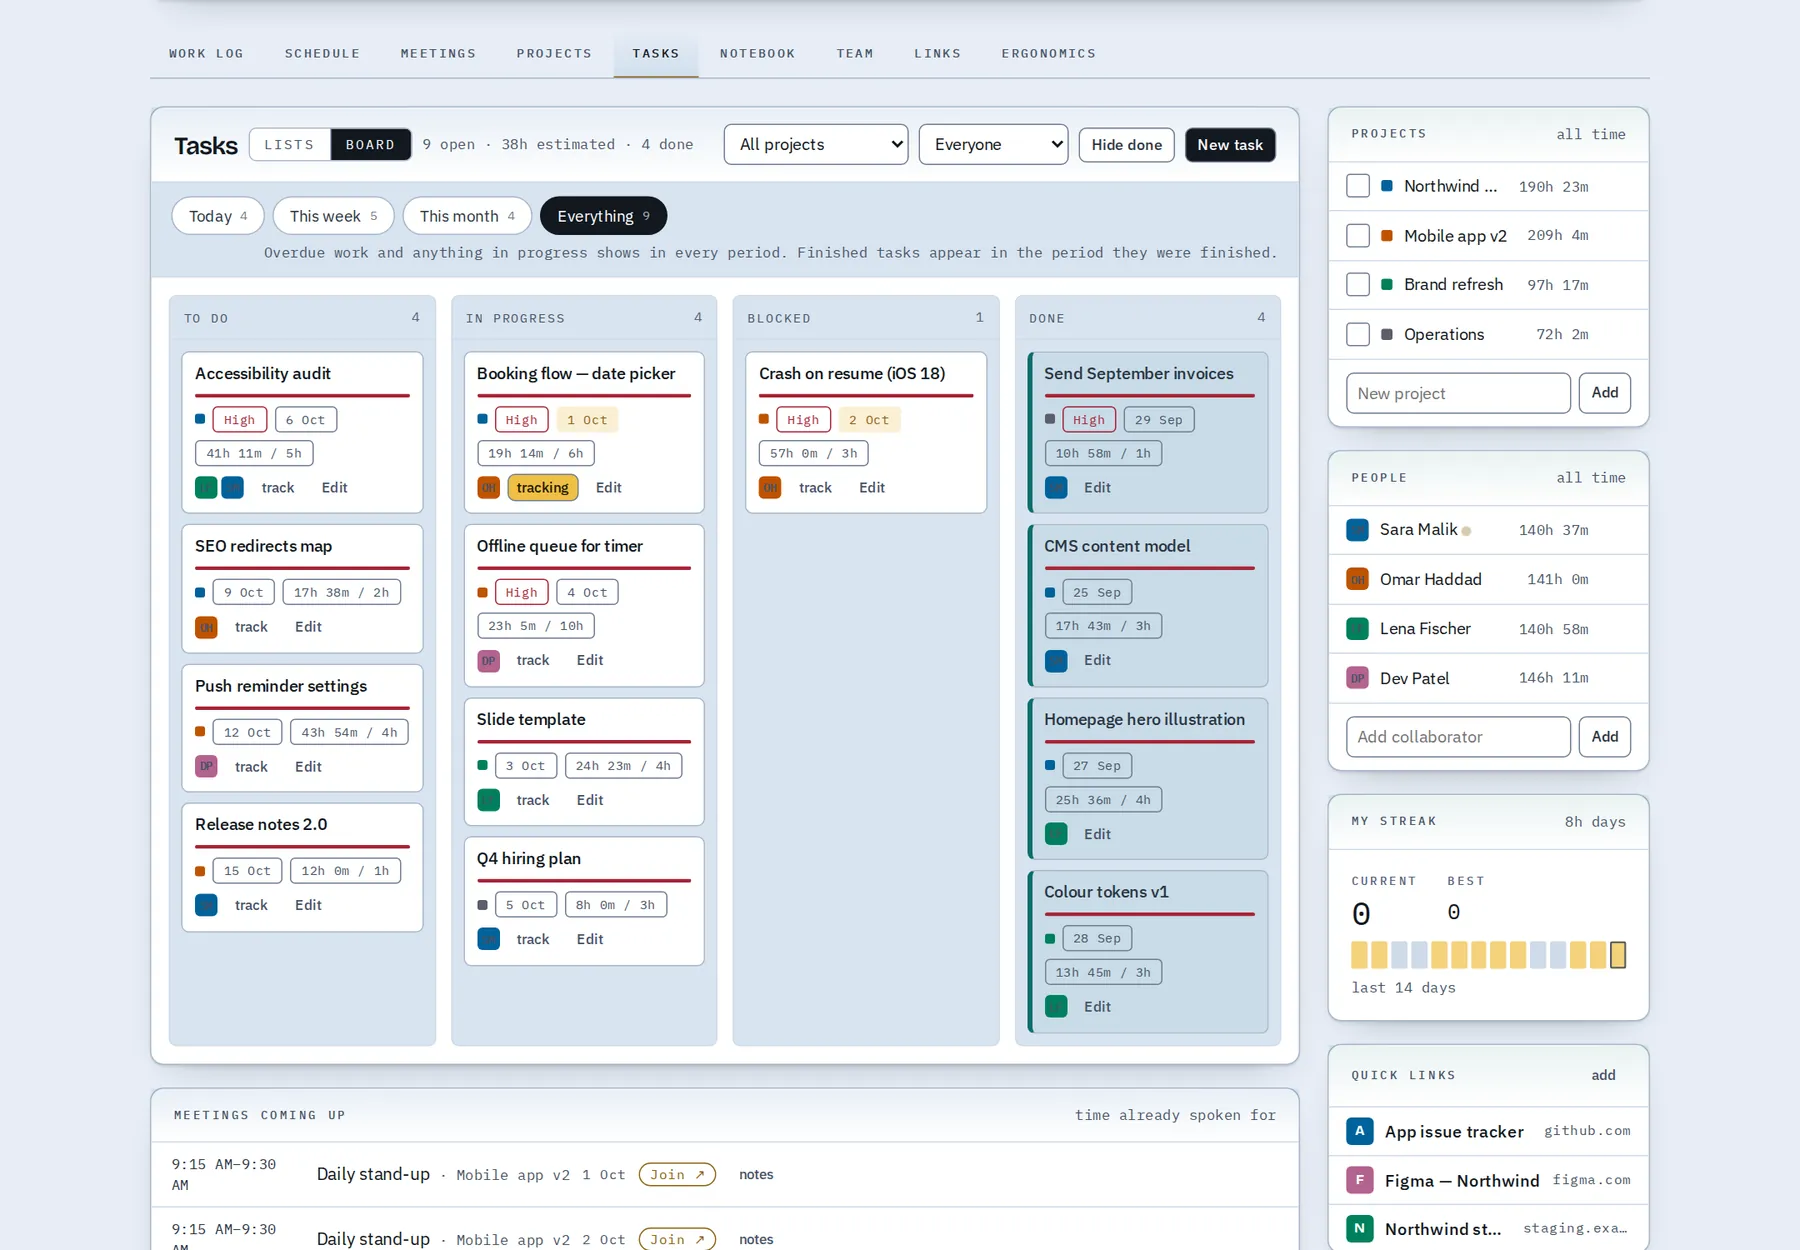
Add a task with New task (or N): title, project, status, assignees, due date, estimate in hours, priority and details.
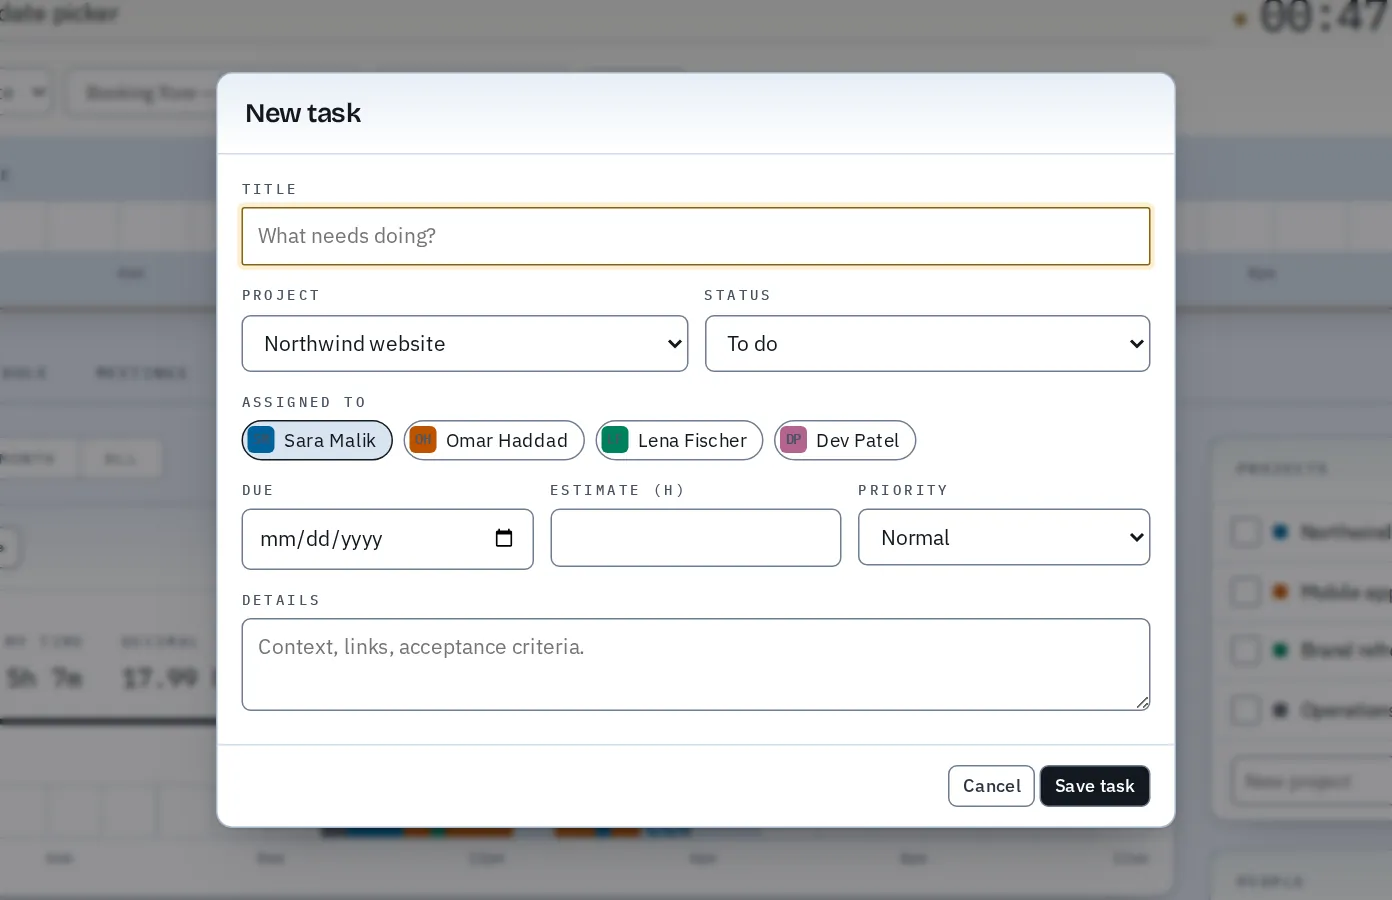
Switch between Lists (waiting and completed) and a Board with To do, In progress, Blocked and Done columns. Drag cards across the board, filter by person or project, and press track on any task to start its timer.
10. Notebook
Keep notes next to your time. Organise them into notebooks → sections → pages. Pages support light Markdown: # headings, - bullets, - [ ] checklists, > quotes and **bold**.
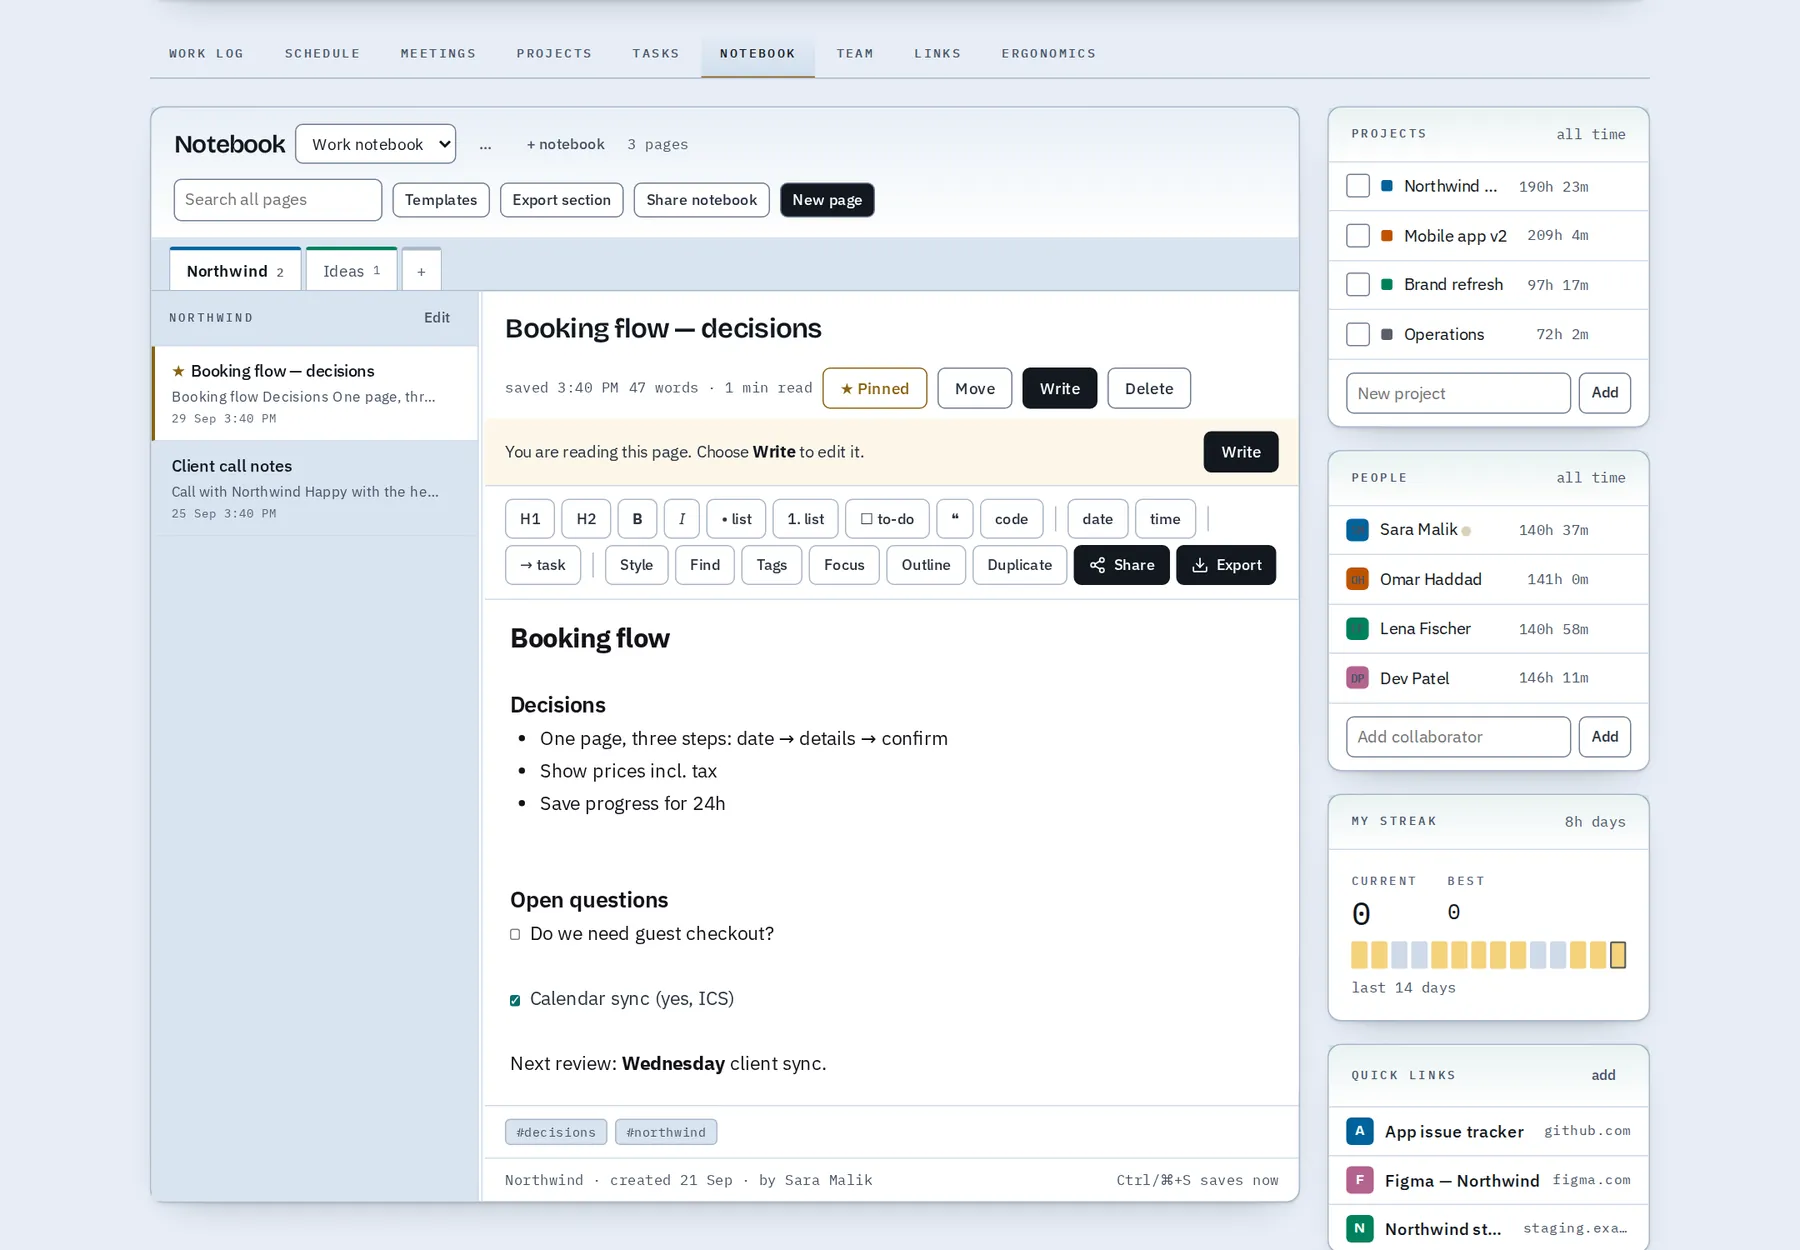
- Toggle between Write and Read; use templates for meeting notes and more.
- Tag and pin pages, search across everything, and turn a page into a task.
- Ctrl/⌘+S saves the page now; Ctrl/⌘+F finds in the page.
Share or export a whole notebook
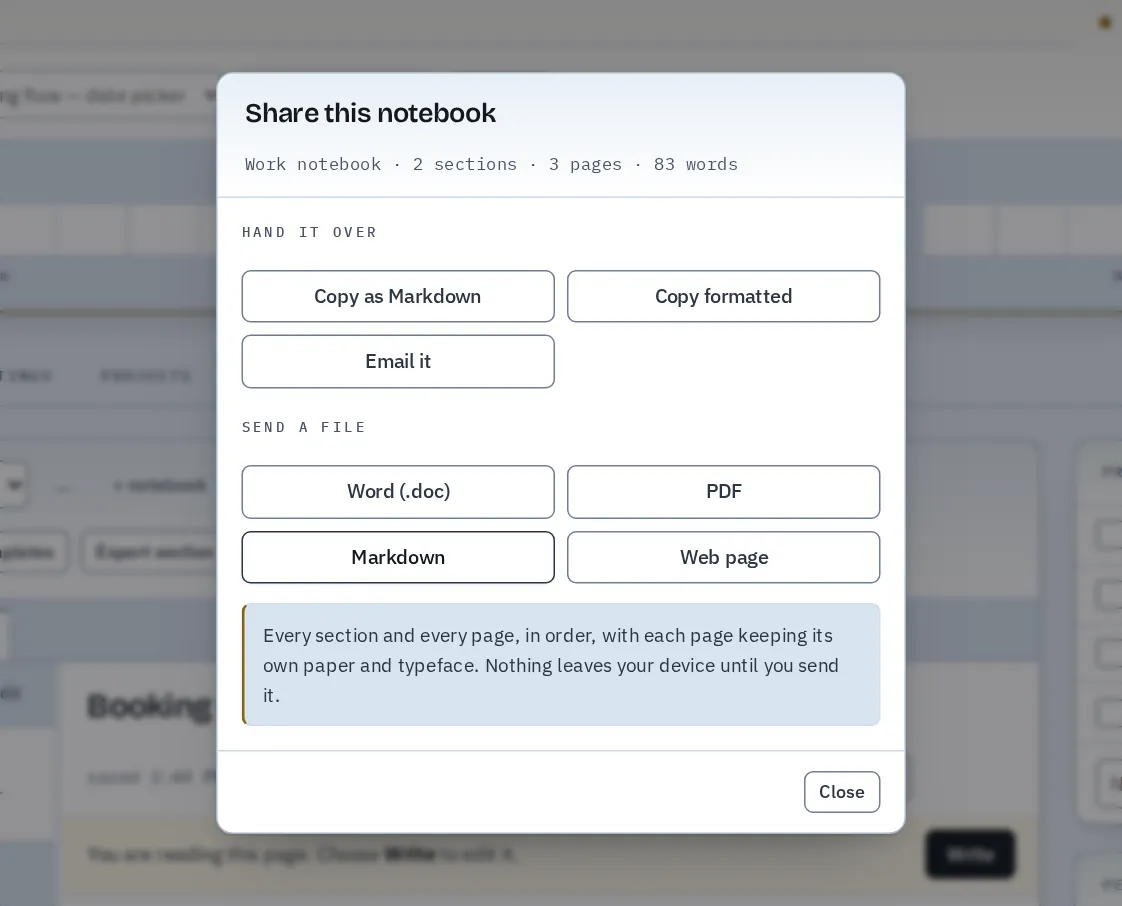
Press Share notebook to hand over every section and page in order. You can copy it as Markdown or formatted text, start an email, or download it as a Word, PDF, Markdown or web page file.
11. Team & capacity
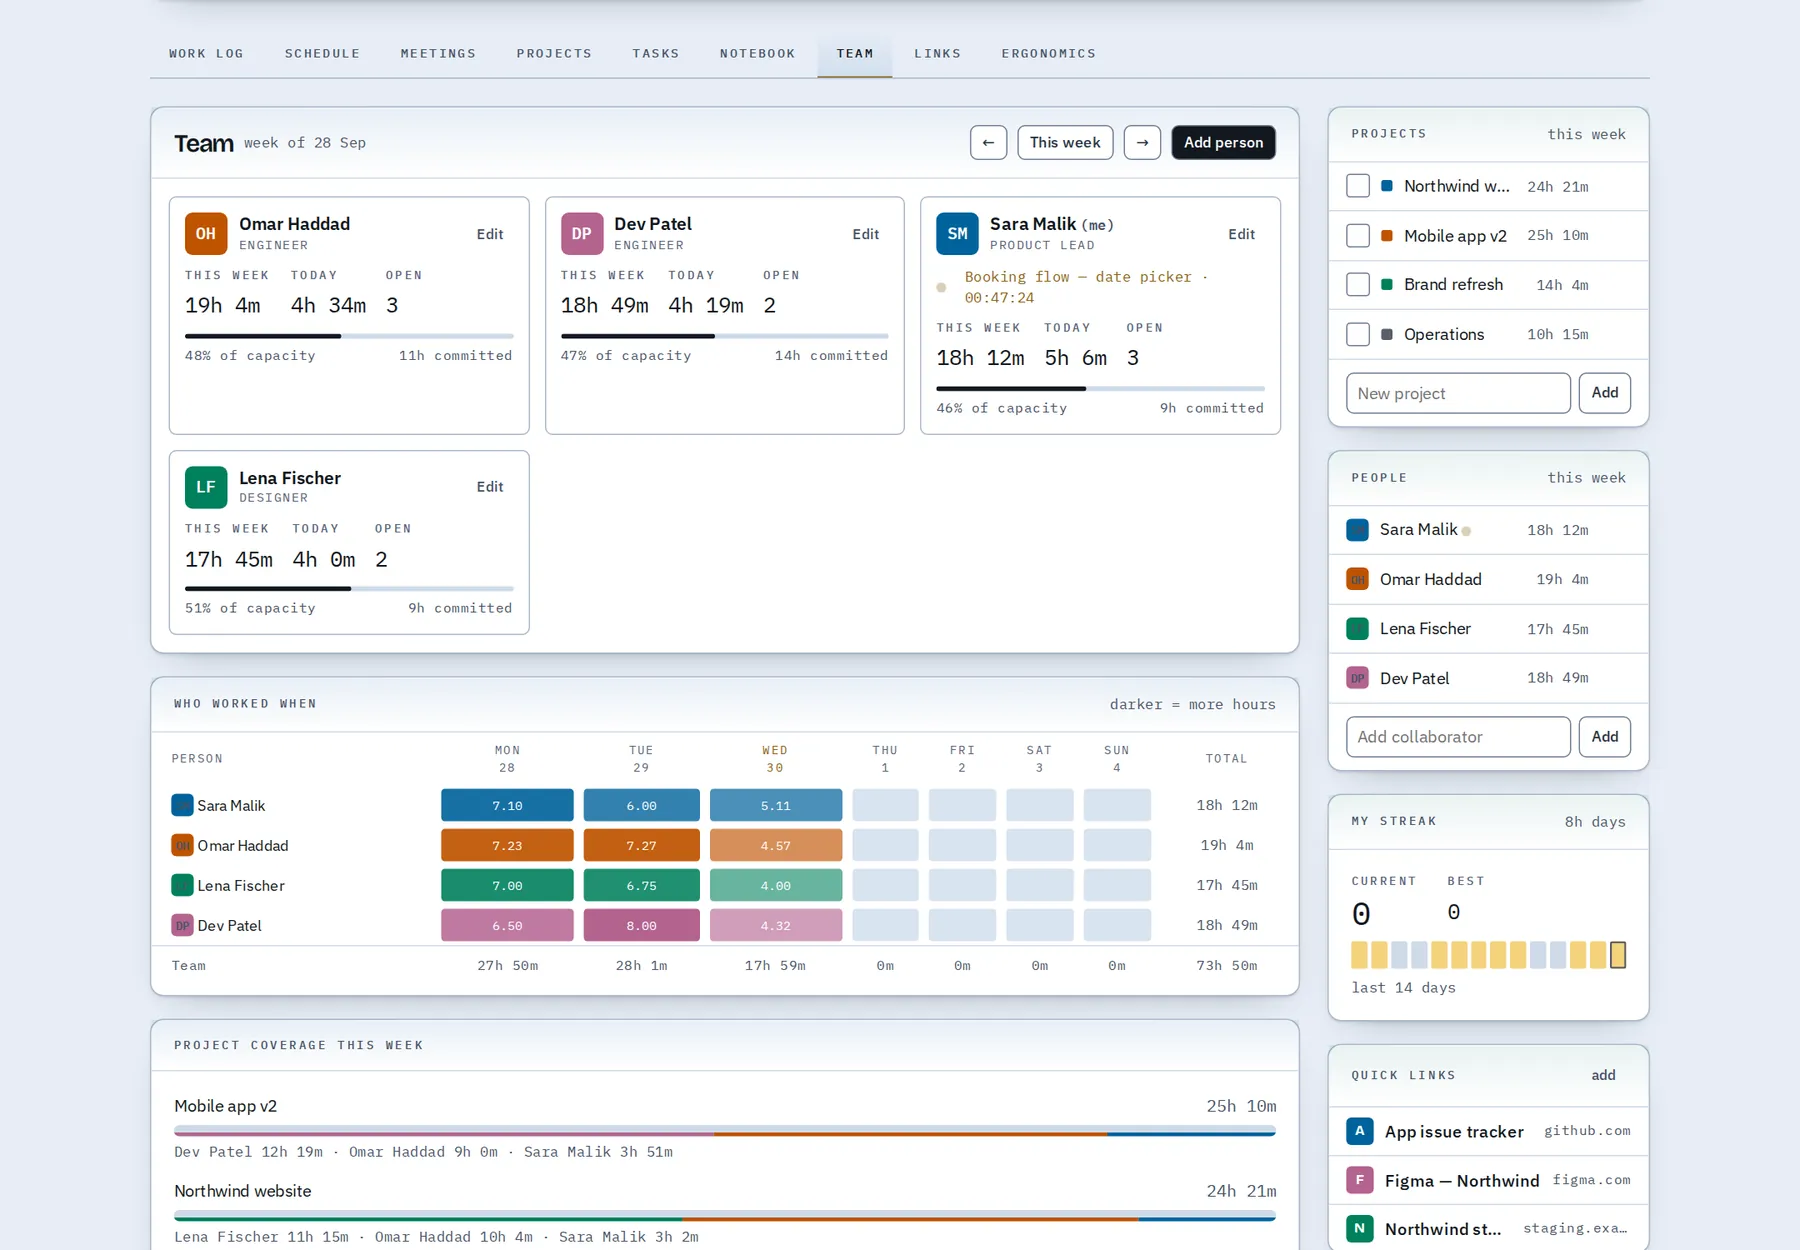
Add collaborators in the People panel. Each person has a role and daily capacity. The Team tab shows each person's hours this week against capacity, what they're tracking right now, and a weekly heatmap of load.
12. Quick links
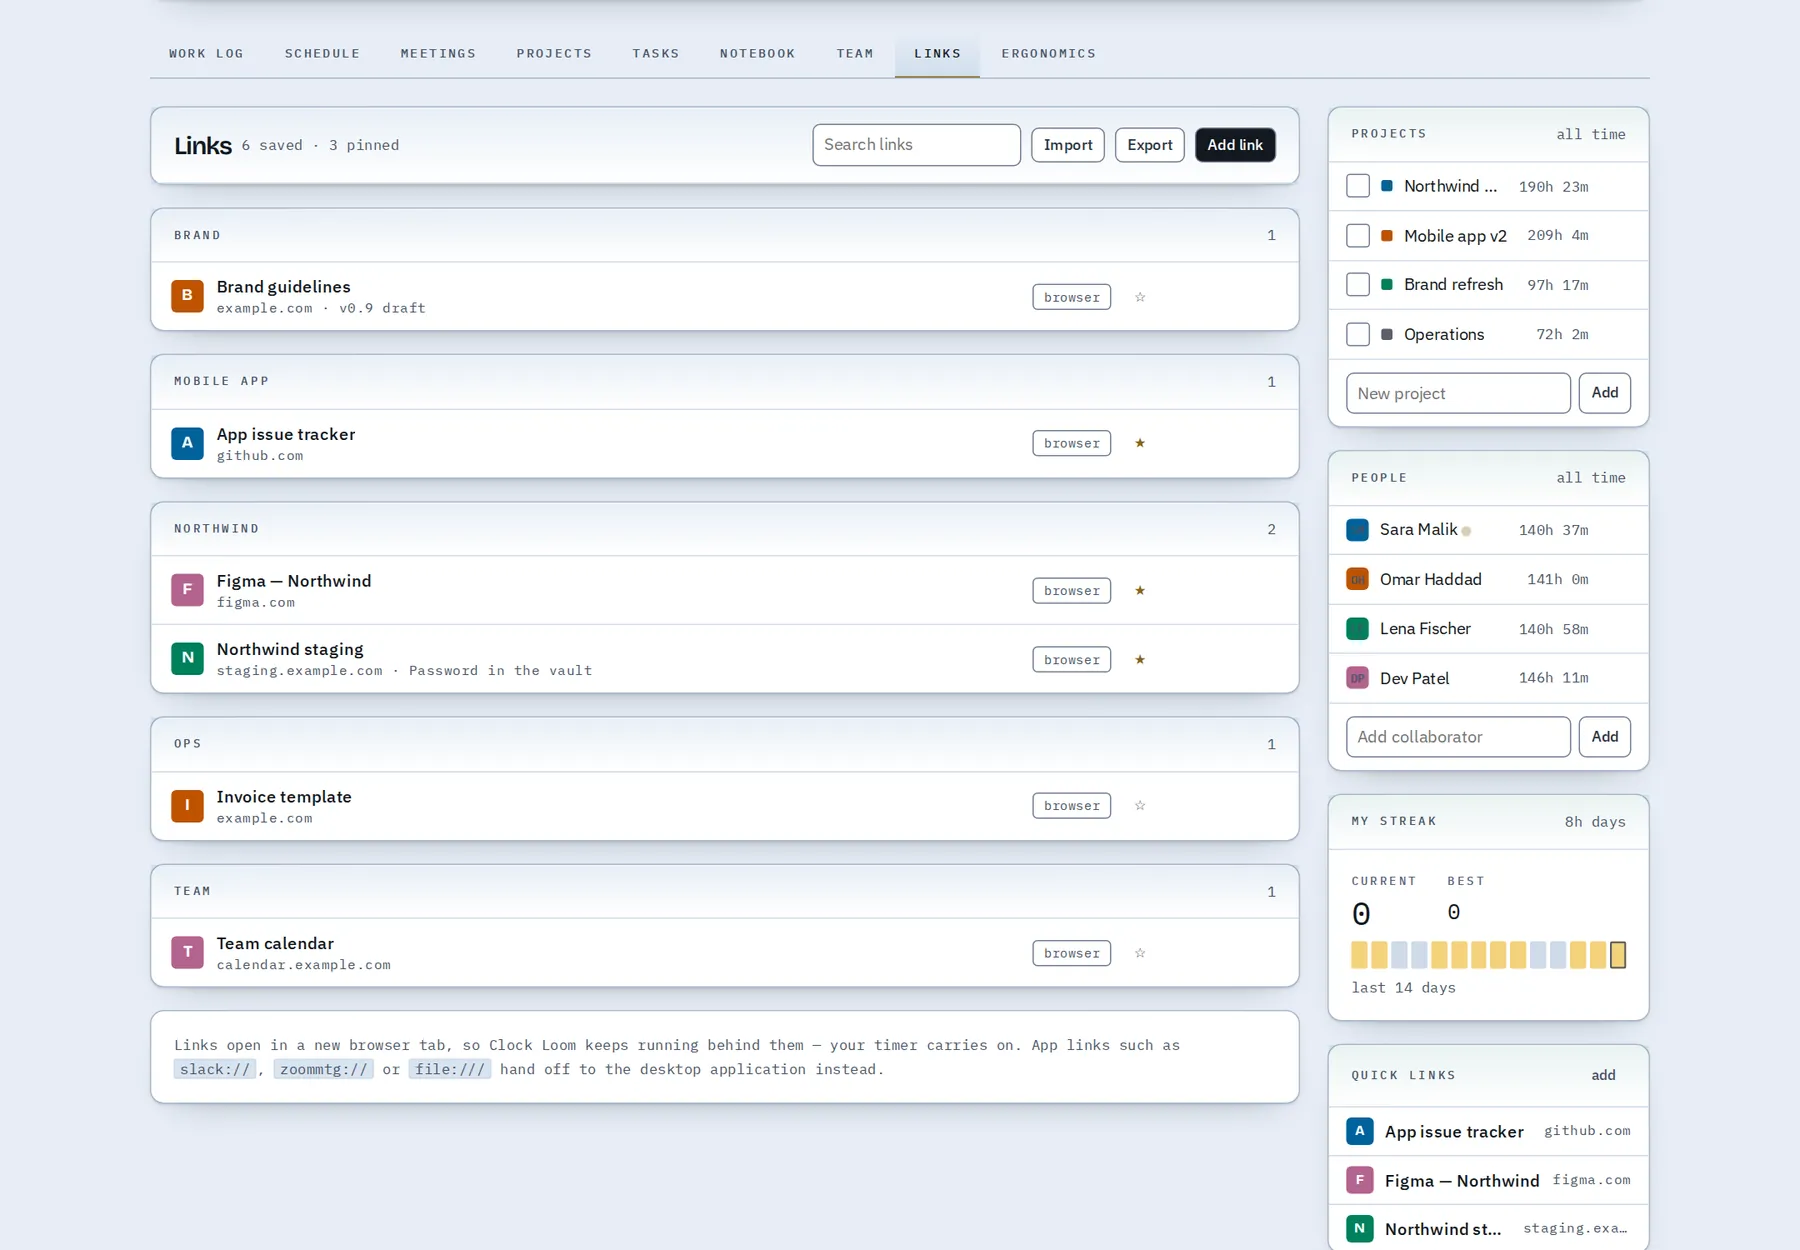
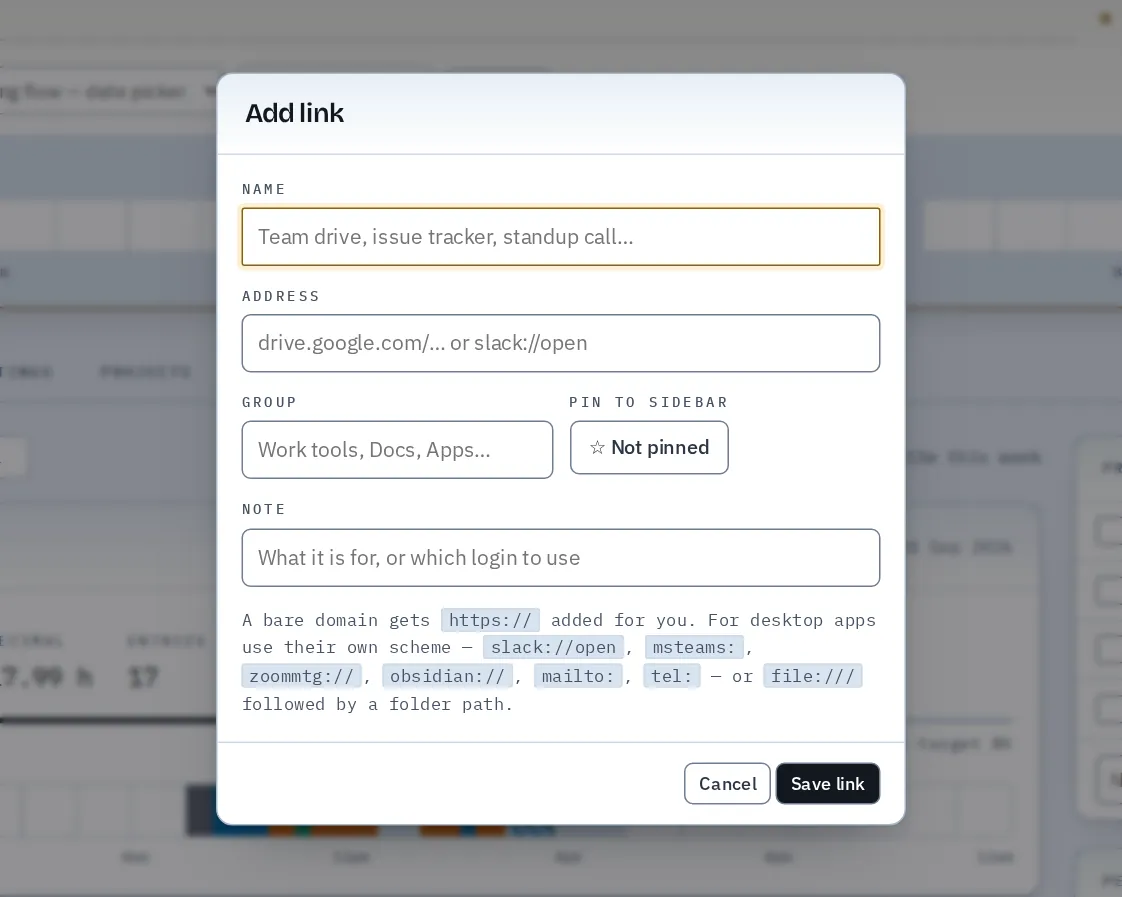
Save the websites and app shortcuts you use every day. Group them, add a note, and pin favourites so they appear in the side panel on every tab. Press L to add one. App links like slack://open and mailto: work too.
13. Ergonomics
Clock Loom looks after you while you work: reminders for eye breaks (20-20-20), posture checks, movement and water. By default they only fire while a timer is running.
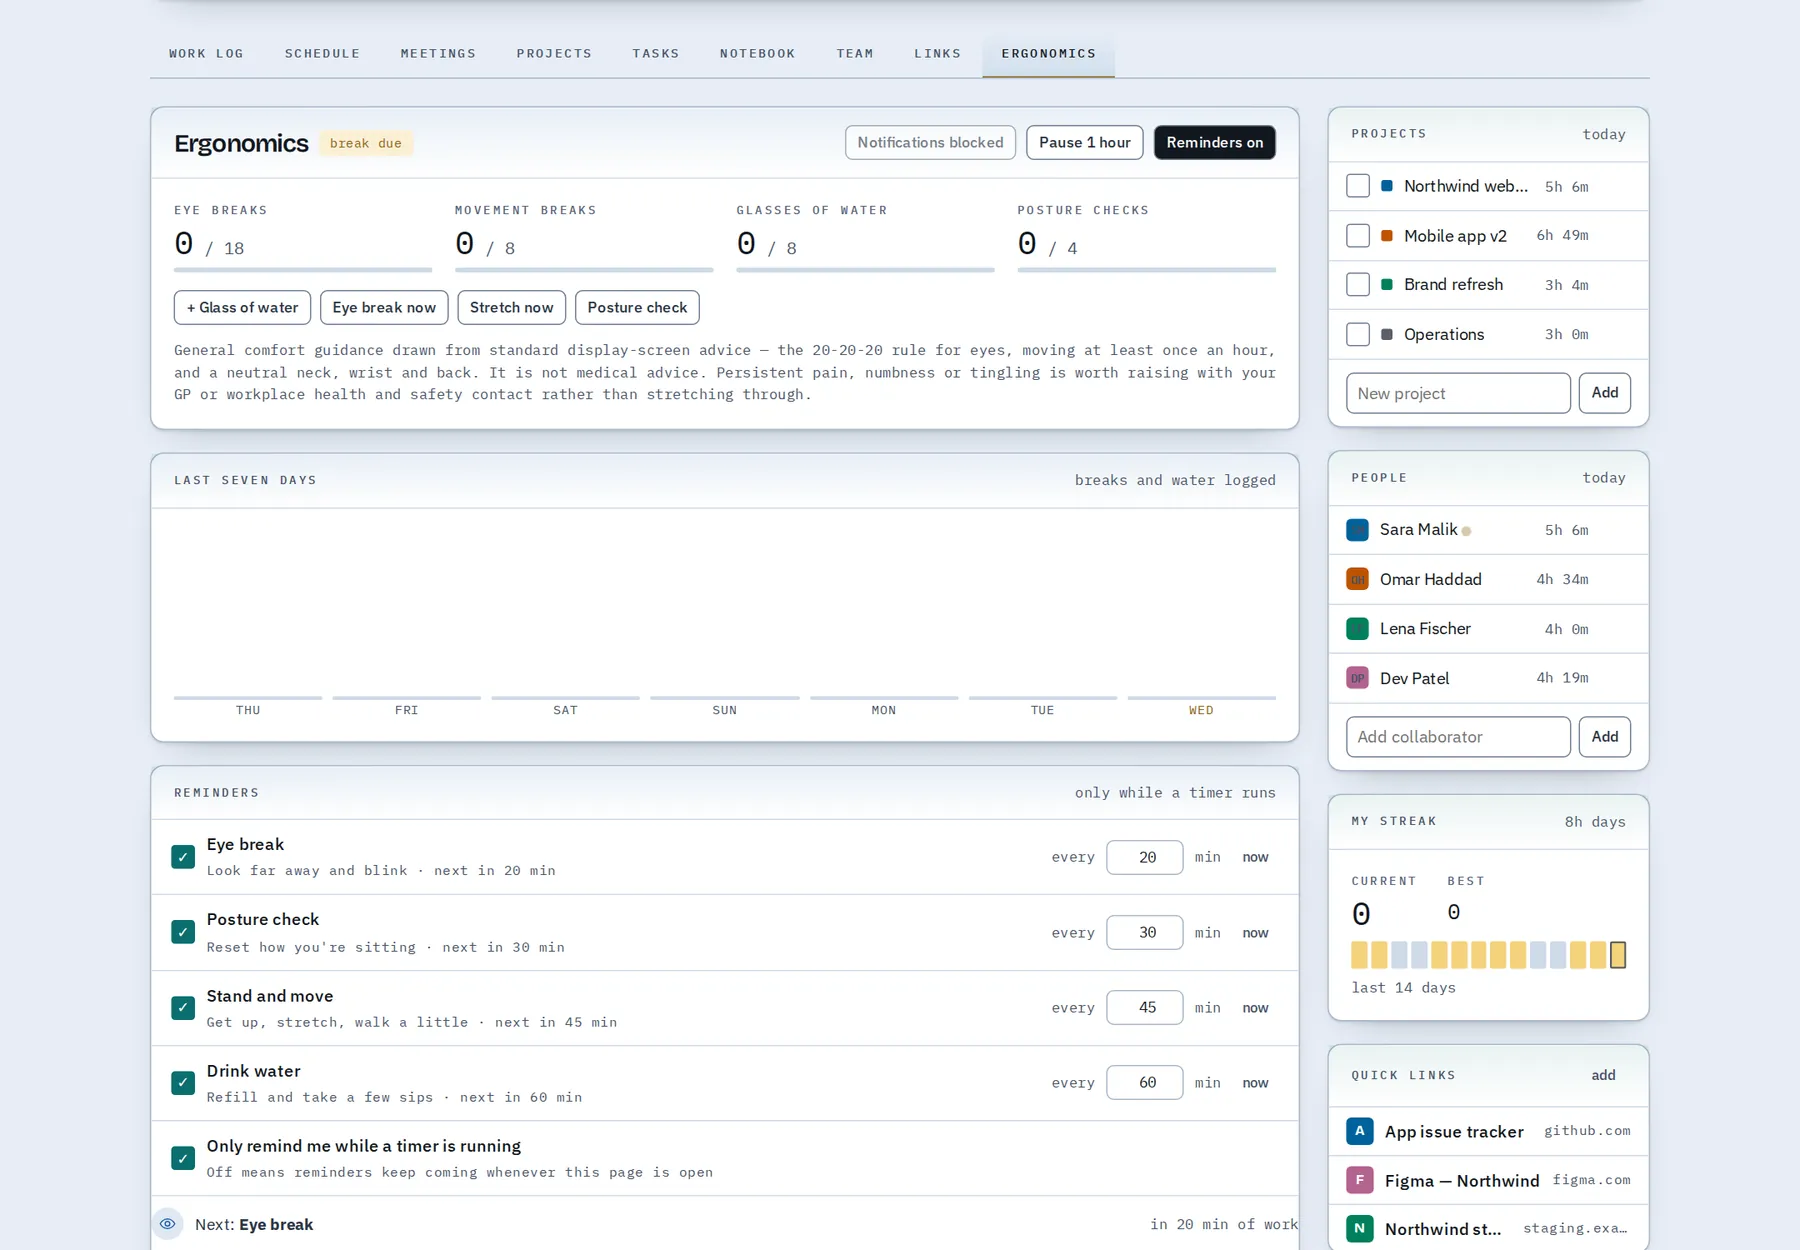
- Turn each reminder on or off and change how often it fires.
- Press B for a guided eye break, W to log a glass of water.
- Pause reminders for an hour, or enable desktop notifications.
14. Reports & standups
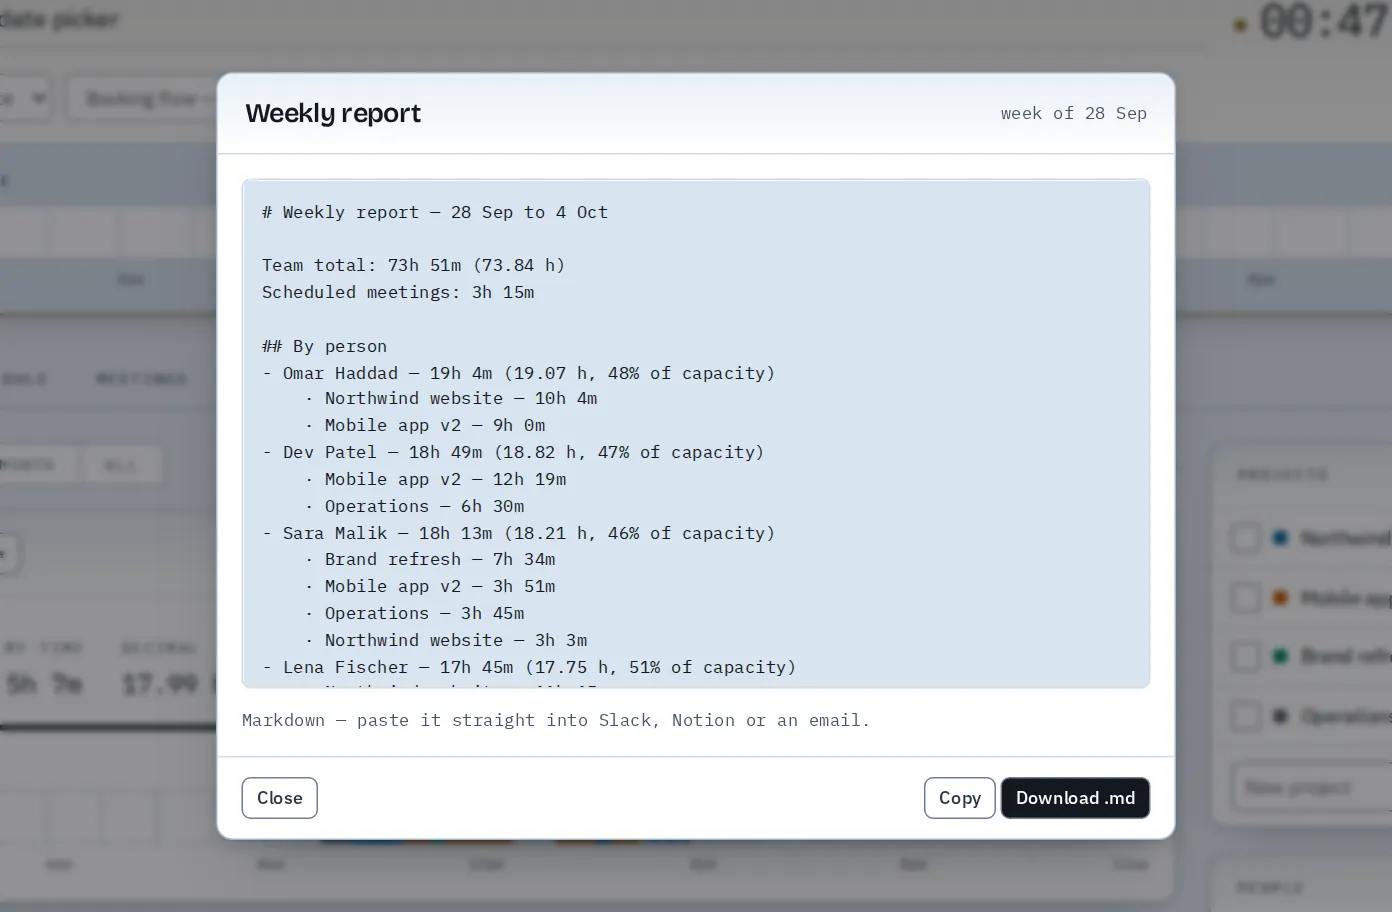
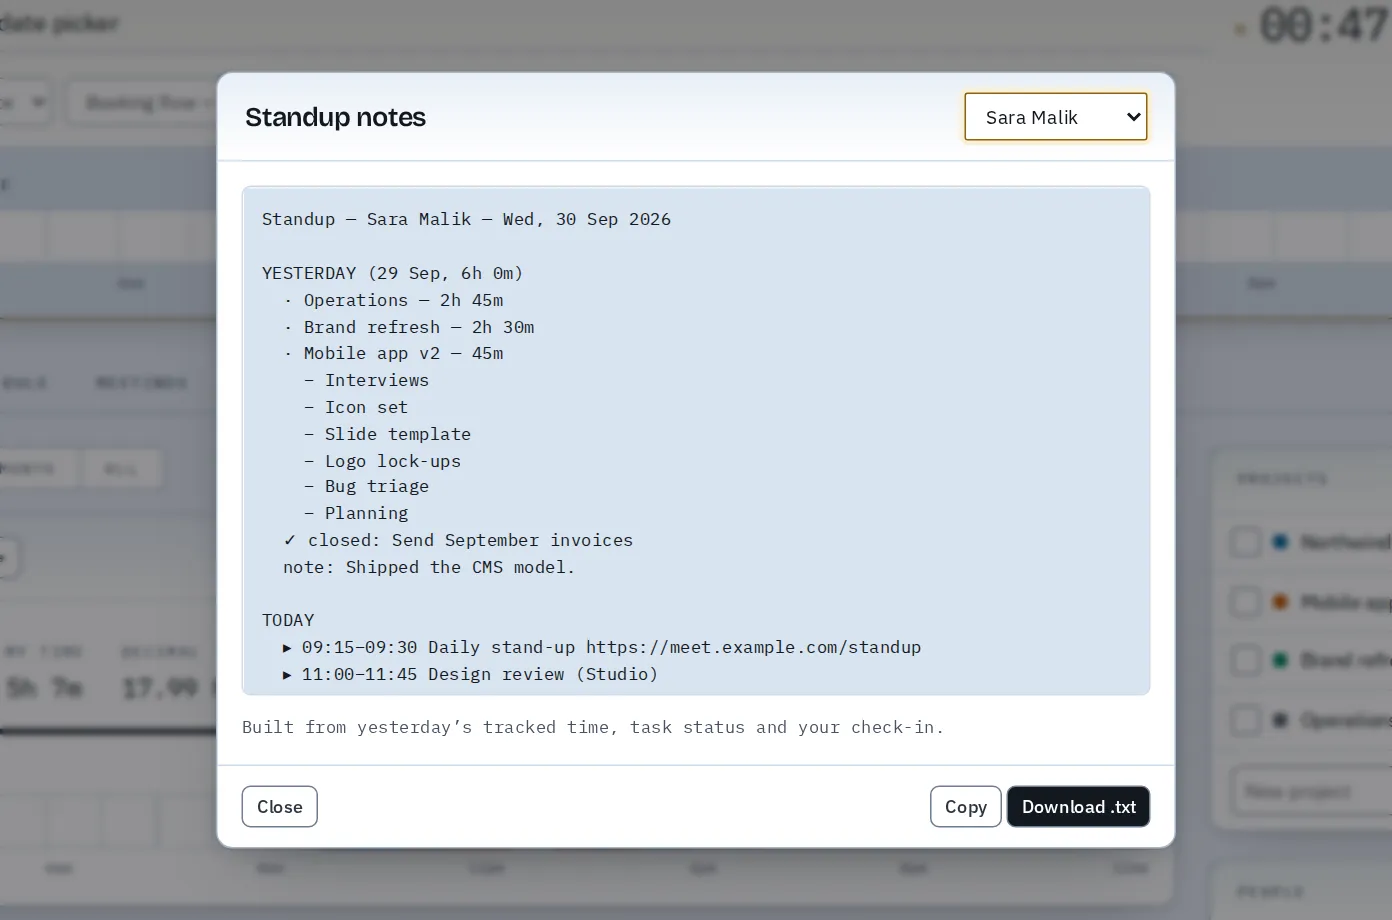
Report drafts a weekly summary — total time, per-person hours against capacity, and per-project breakdowns. Standup writes yesterday / today / blockers notes for anyone on the team from their log, tasks and check-in.
Press P to print the current view or save it as a PDF.
15. Command palette & shortcuts
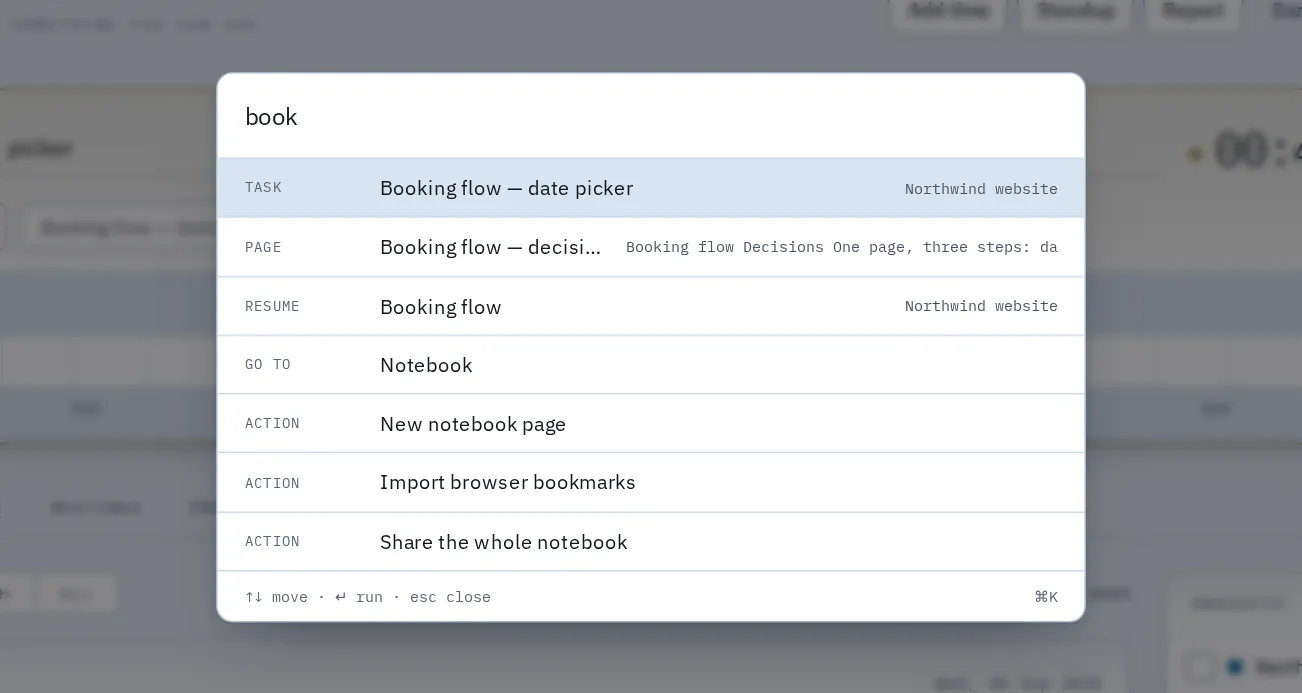
Press Ctrl+K (⌘+K on Mac) to search tasks, pages, projects and commands, then Enter to jump.
| Key | Action | Key | Action |
|---|---|---|---|
| S | Start / stop the timer | 1–4 | Day, Week, Month, All |
| A | Add time | 5 | Meetings |
| N | New task | 6 / 7 | Projects / Tasks |
| M | Schedule meeting | 8 / 9 | Notebook / Team |
| L | Add link | 0 / - | Links / Ergonomics |
| B | Take an eye break | W | Log a glass of water |
| P | Print / PDF | Ctrl/⌘+Z | Undo |
| Ctrl/⌘+S | Save now | Esc | Close a dialog |
16. Settings & dark mode
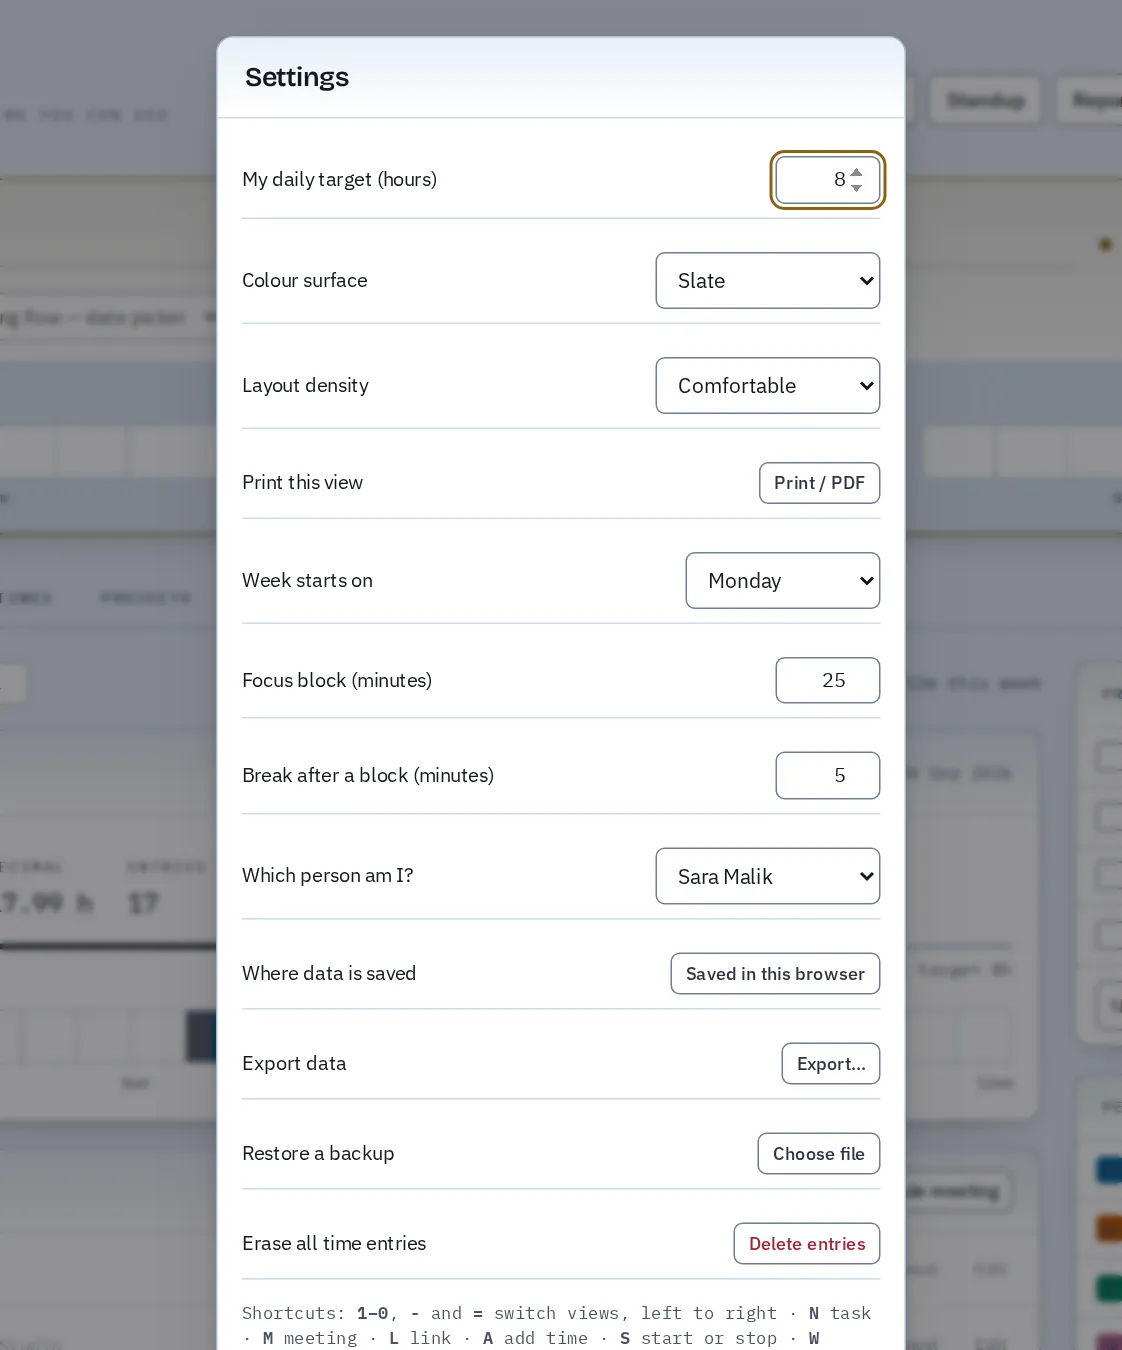
Open Settings to set your daily target, colour surface, layout density, week start, focus and break lengths, and which person is “you”. Import and export data and restore backups here too.
17. Account, sync & backups
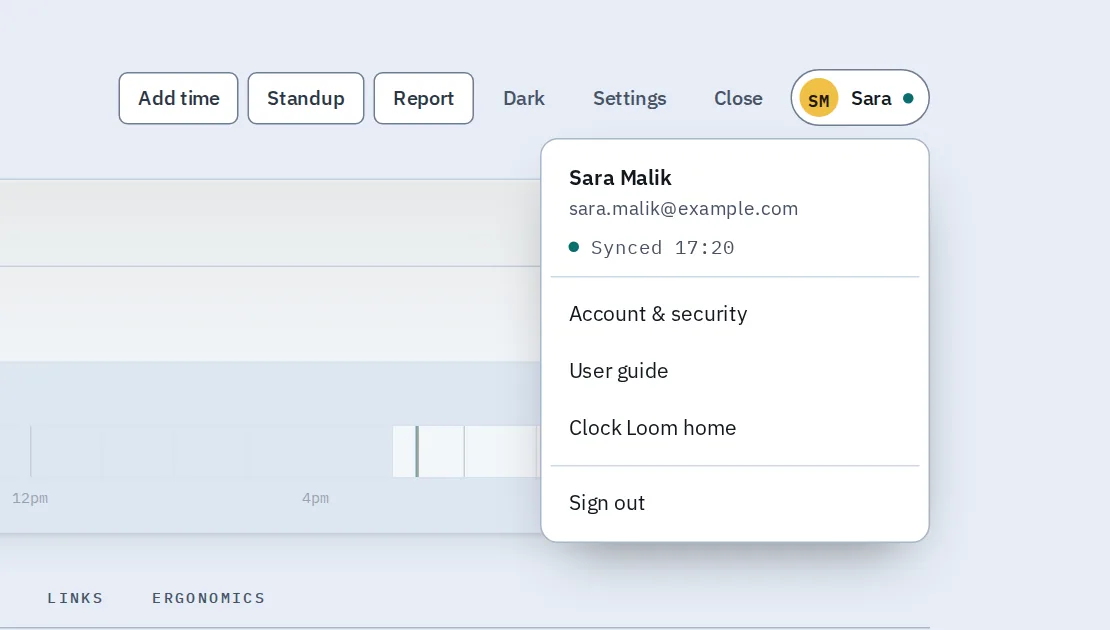
When you're signed in, the account button sits at the right of the dashboard header. Its dot shows sync status: green synced, amber saving, red offline or needs attention.
How syncing works
- Every change saves to your account within a second, and a copy is kept in your browser.
- Project documents you attach are uploaded to your account too (25 MB per file, 250 MB in total per account by default).
- Offline? Keep working. Changes stay on the device and upload when you reconnect.
- Two devices at once? If another device saved first, Clock Loom asks whether to Load latest or Keep this tab's version — nothing is overwritten silently.
- Only one tab per browser edits at a time; other tabs open read-only until you choose Work here instead.
Your account page
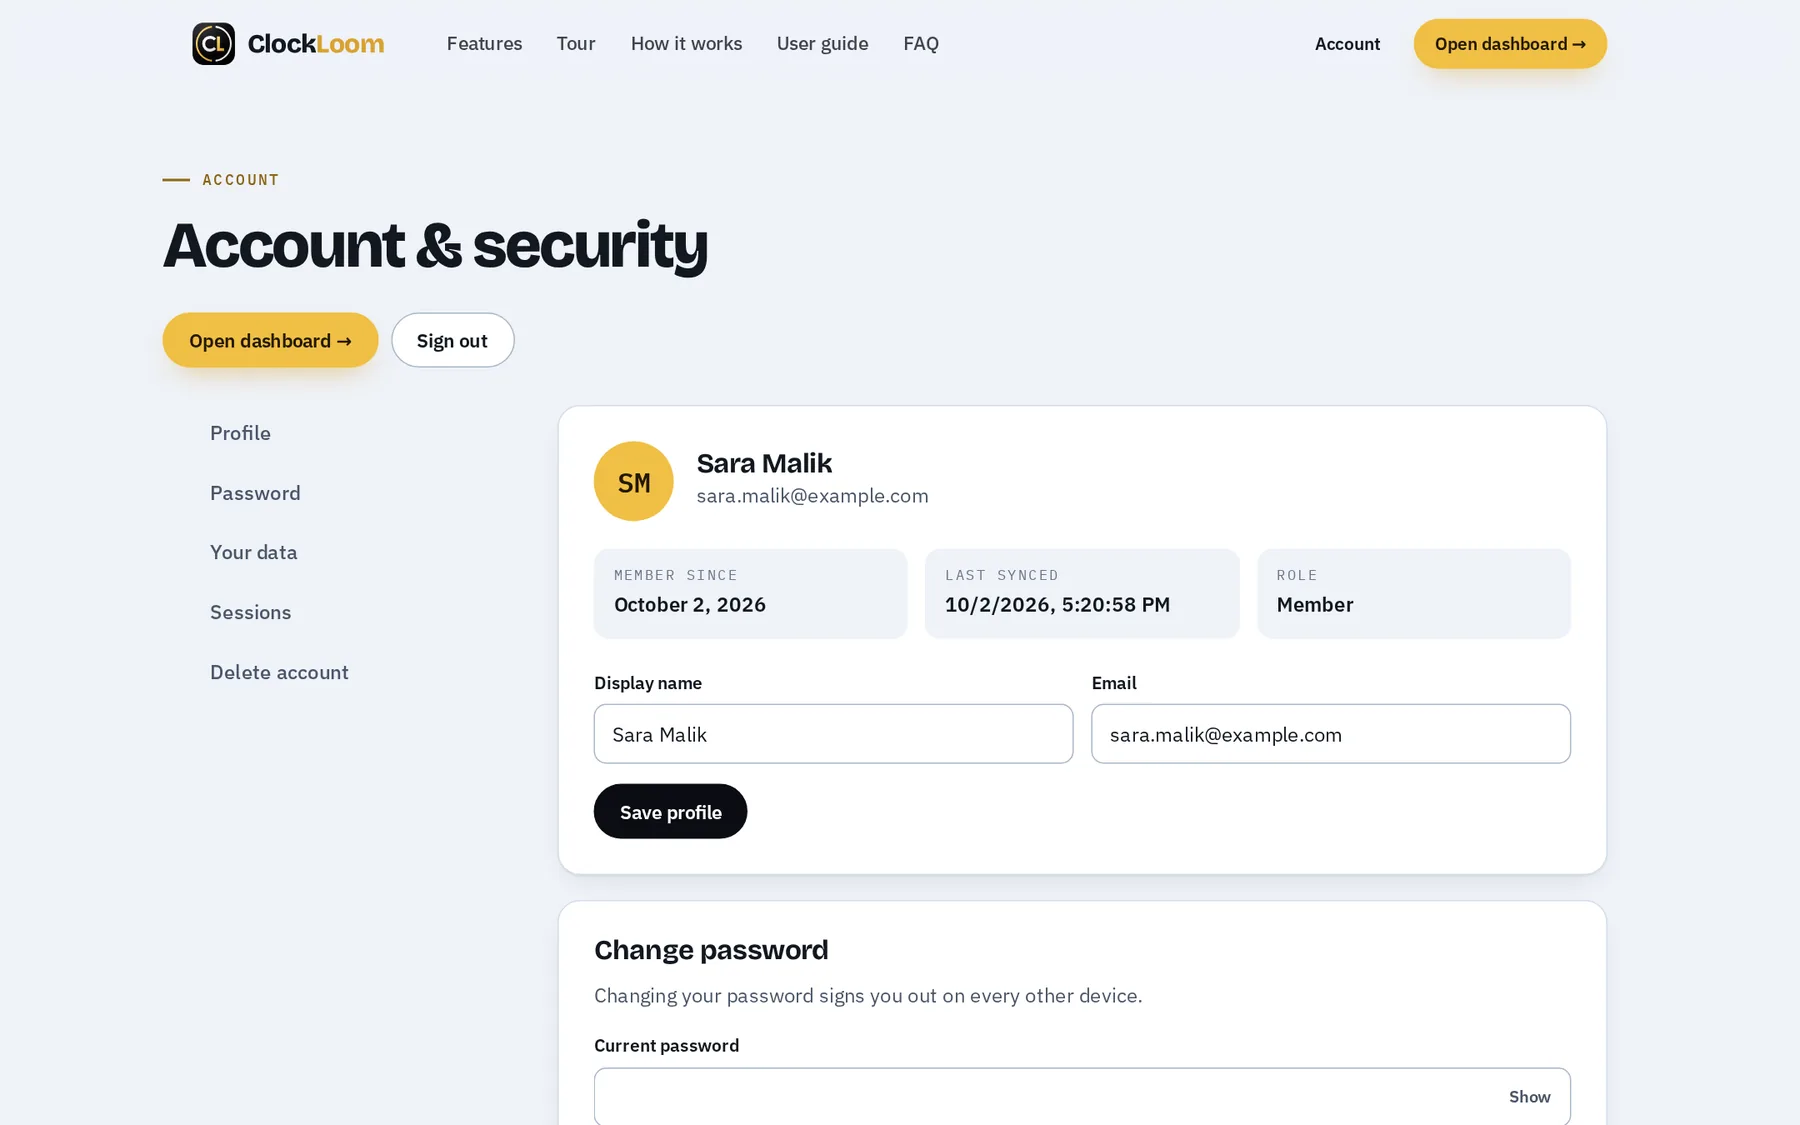
- Download backup saves a complete JSON copy. Restore it anywhere with Settings → Restore a backup.
- Change password signs out your other devices.
- Sign out everywhere if you used a shared or lost computer.
- Delete account removes your account and all saved data permanently.
If you're an administrator
- Your account menu and the site's top bar also show Admin. It opens the admin console, where you can see accounts, invite people, send password links, disable or delete accounts, and give or remove the administrator role.
- Everyone else sees none of this; the console is only served to administrators.
18. Troubleshooting
| What you see | What to do |
|---|---|
| “Clock Loom is open in another tab” | Another tab is editing. Close it, or press Work here instead. |
| “Changed on another device” | Pick Load latest to get the newest version, or Keep this tab's version to replace it. |
| “Your session has ended” | Log in again. Changes made meanwhile are kept on the device and sync after you log in. |
| Reminders don't pop up | They only fire while a timer runs (changeable in Ergonomics). Allow notifications if you enabled them. |
| “The file could not be uploaded” | Check your connection. Files must be under 25 MB, and your total attachment space must not be full. For big files, add a link instead. |
| Reset email didn't arrive | Check spam, wait a minute, and request again. Links expire after an hour. |
Ready to weave your hours?
Create a free account and your dashboard is ready in seconds.